
Quotes To Live By
Building things is the best way to learn a new technology. While I was reading the Flask book I decided to start the other way around: clone/extend the example project first, and read along to fill in the missings gaps. This get-your-hands-dirty-soon approach really worked. I grasped the framework much faster. I created an app on top of it to post and comment quotes: Quotes To Live By. In this post I share what I learned: obviously Flask, but also gamification, Slack integration, posting to an API, some JS/CSS and Heroku deployment.
Learning
The best way is to set concrete tasks around features to add. This way you really get into the nitty gritty of the technology at hand. Some things I learned:
-
Extend models (DB tables) to hold more data (fields), which touches models, views, and migrating/upgrading the DB.
-
Advanced model stuff like giving admin roles more fields to edit than regular users (admins only can add posters to quotes for example).
-
Adding a gamification system to give users badges after adding an amount of quotes, comments or having x amount of followers.
-
What goes where? How to make customizations to views, static files etc, I know the structure of a Flask app pretty well now.
-
Use Flask as API. The Flasky project already came with an API which made Slack integration and automatic posting very easy.
-
Deploy the app to Heroku.
Gamification
I love this stuff, giving users incentives like Stackoverflow, I already used this approach in my Free Monkey Android app which some told me gave it an addictive touch.
Again Flasky gave a great starting point: the user registration, following, commenting etc was all in place. It was pretty easy to add this.
I started simple with gamification based on number of comments, followers, and quotes, cutting out badges (Gimp) from rows 1, 2 and 4 for each category respectively:
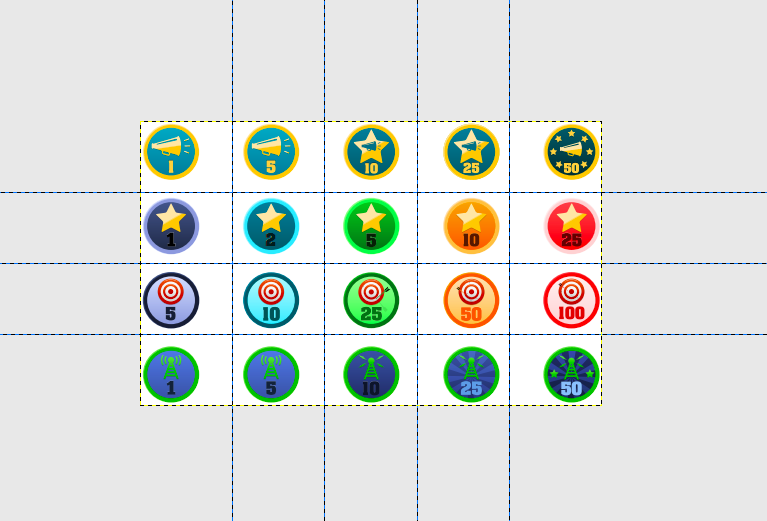
- I added the images to ./static/badges and created a badge module:
badge.py
from flask import url_for

BADGE = 'badges/{award}{num}.png'

class Badge:
	def __init__(self, award, badges, num_actions):
		self.award = award
		self.badges = badges
		self.num_actions = num_actions
		self.title = "Badge earned for {} {}".format(
			self.num_actions, self.award)
		self.src = self._get_badge()

	def _get_badge(self):
		res = [i for i in self.badges if self.num_actions >= i]
		if not res:
			return False
		badge = BADGE.format(award=self.award[0], num=res[-1])
		return url_for('static', filename=badge)

def get_badges(user):
	yield Badge("quotes", (1, 5, 10, 25, 50), user.posts.count())
	yield Badge("comments", (1, 5, 10, 25, 50), user.comments.count())
	yield Badge("followers", (5, 10, 25, 50, 100), user.followers.count() -1)
In views.py I get the badges for the user and pass them along as extra kwarg in render_template:
@main.route('/user/<username>')
def user(username):
	user = User.query.filter_by(username=username).first_or_404()
	...
	badges = list(get_badges(user))
	return render_template('user.html', user=user,
						posts=posts, badges=badges,
						pagination=pagination)
In templates/user.html I include the html:
Where badges.html is:
![]()
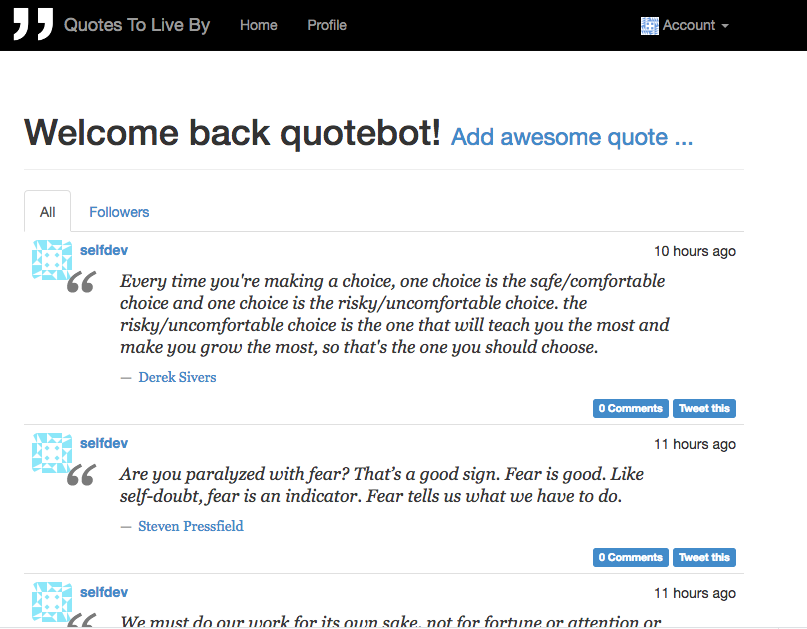
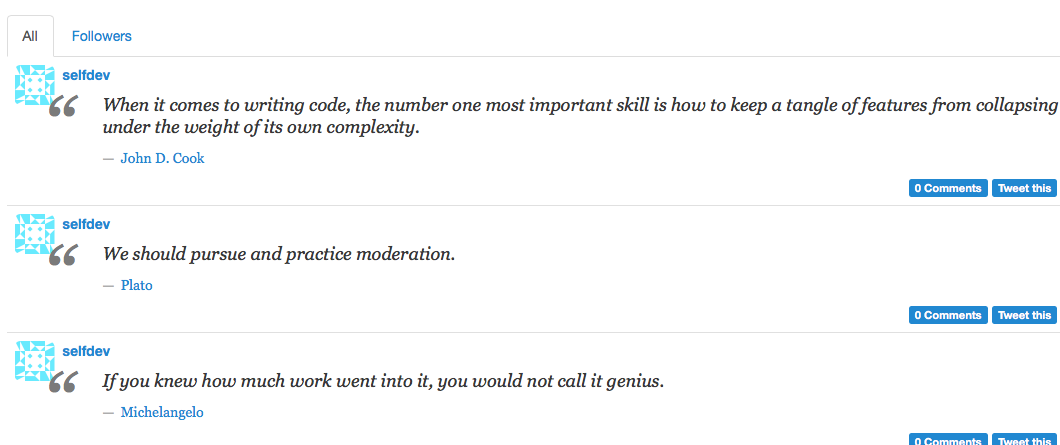
And voila they render on my profile: I need to work on followers but I already get badges for comments and number of quotes:
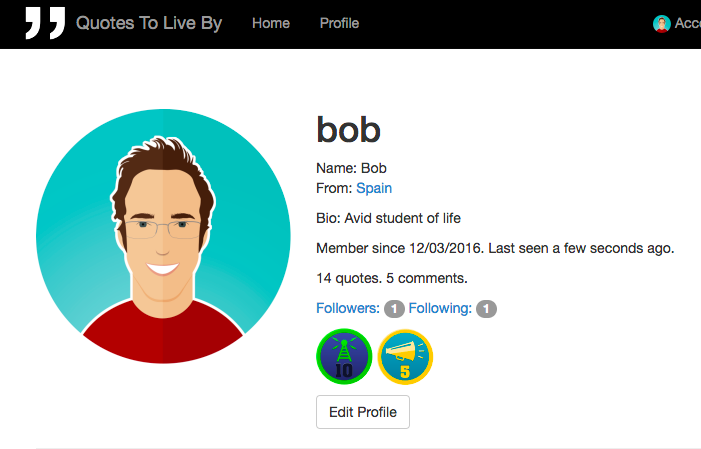
One #TODO is notifications when a user earns a badge, so hitting the nth quote, comment, follower, you get a notification and/or email.
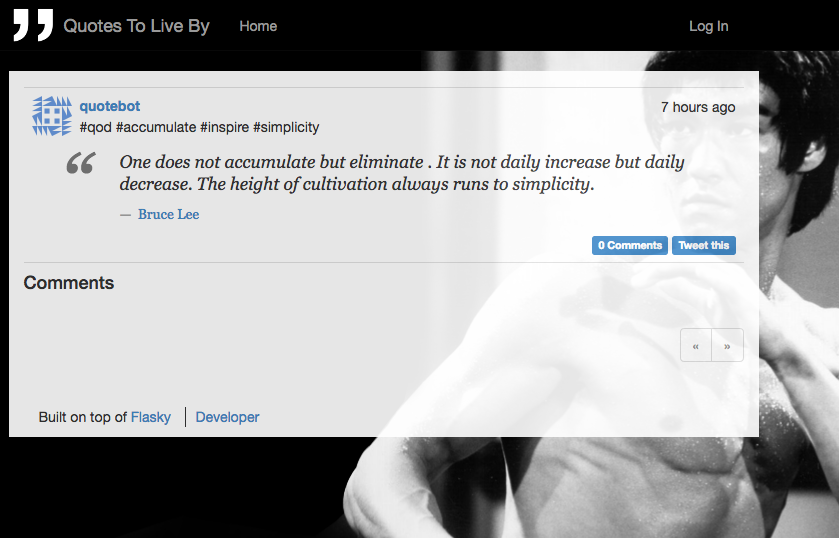
Automate the quoting
Adding quotes manually is nice but I wanted some of the content to be added automatically. Time to consume a quote API. Again Flasky already came with its API (api/v1.0/posts) which made this easy.
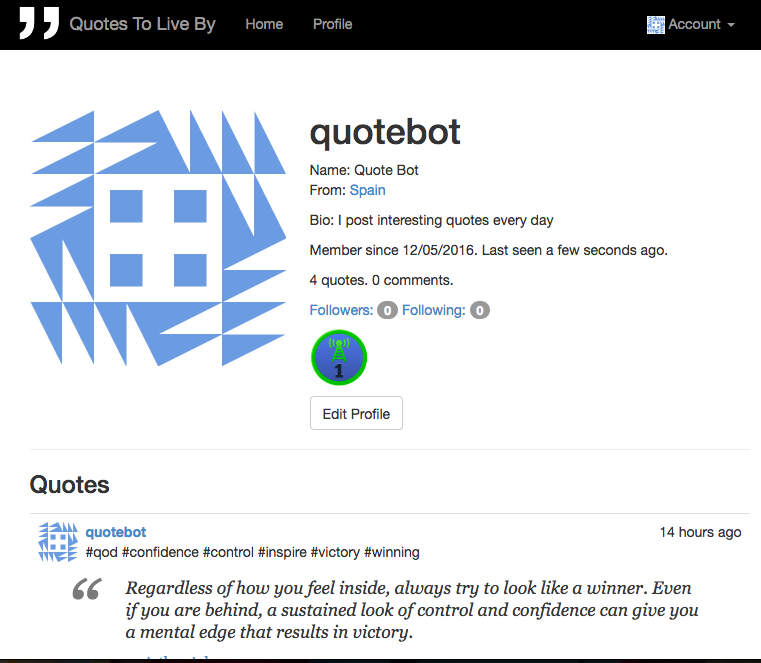
I created a new QTLB user “quotebot” and defined its user + pw in env variables, requests.auth.HTTPBasicAuth makes it easy to pass them along. I run this script on my Bluehost server, to post the “quote of the day” everyday at noon CET. I defined other than “qod” categories to post more if desired (providing a cli arg):
qod.py
import json
import os
import requests
import socket
import sys

QOD_LINK = "http://quotes.rest/qod.json"
LOCAL = "macbook" in socket.gethostname().lower()
API_URL = "http://127.0.0.1:5000/" if LOCAL else "https://qtlb.herokuapp.com/"
POST_URL = API_URL + "api/v1.0/posts/"
USR = os.environ.get('QTLB_USR') or sys.exit("set USR env var")
PW = os.environ.get('QTLB_PW') or sys.exit("set PW env var")
AUTH = requests.auth.HTTPBasicAuth(USR, PW)
HEADERS = {'Content-Type': 'application/json'}
CATEGORIES = {
	"inspire": "Inspiring Quote of the day",
	"management": "Management Quote of the day",
	"sports": "Sports Quote of the day",
	"life": "Quote of the day about life",
	"funny": "Funny Quote of the day",
	"love": "Quote of the day about Love",
	"art": "Art quote of the day ",
	"students": "Quote of the day for students",
}

def get_qod(category=None):
	link = QOD_LINK
	if category:
		link += '?category={}'.format(category)
	resp = requests.get(link)
	if resp.status_code != 200:
		sys.exit("failed to get daily quote")
	return resp.json()["contents"]["quotes"][0]

if __name__ == "__main__":

	category = None
	if len(sys.argv) > 1:
		category = sys.argv[1].lower()
		if not category in CATEGORIES.keys():
			sys.exit("unknown category")

	qod = get_qod(category)
	data = {
		'body': qod['quote'],
		'who': qod['author'],
		'inspiration': ' '.join(['#'+tag for tag in ['qod'] + qod['tags']]),
		'cover': qod['background'],
	}
	resp = requests.post(POST_URL, auth=AUTH,
		headers=HEADERS, data=json.dumps(data))
	if resp.status_code == 201:
		print("OK")
	else:
		print("FAIL with status code: {}".format(resp.status_code))
And this is what it does:
Slack integration
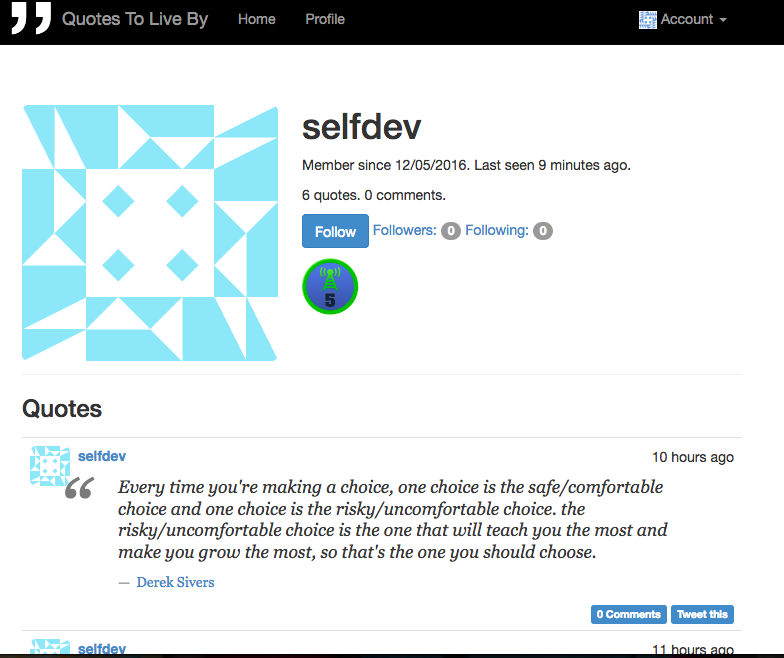
Another cool feature I wanted from the start was auto-posting from Slack. So I created another user called “selfdev” (most quotes are, right?)
… and set up a Slack integration - outgoing webhook
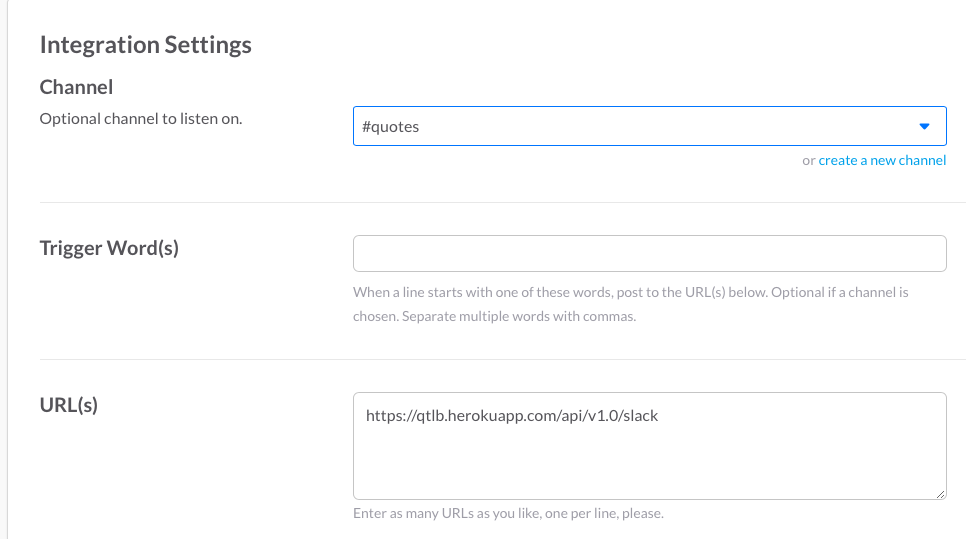
Code to call the internal Flasky API:
api_1_0/posts.py
SLACK_WEBHOOK_SECRET = os.environ.get('SLACK_WEBHOOK_SECRET')
SLACK_USER = os.environ.get('SLACK_USER')
DELIMIT = "-"

...
...

@api.route('/slack', methods=['POST'])
def inbound():
	if request.form.get('token') != SLACK_WEBHOOK_SECRET:
		return Response('Not authorized'), 403
	text = request.form.get('text')
	if not DELIMIT in text:
		return Response('No valid delimiter between quote body and who'), 400
	user = User.query.filter_by(username=SLACK_USER).first_or_404()
	post = Post()
	post.author_id = user.id
	post.body = "".join(text.split(DELIMIT)[:-1]).strip().replace('"', '')
	post.who = text.split(DELIMIT)[-1].strip()
	db.session.add(post)
	db.session.commit()
	return Response('Post created'), 201
So now when I post in the #quotes Slack channel:

These quotes get auto-posted to QTLB:
Last feature: full screen background cover images for quotes
This was merely a JS/CSS change I could make in static/base.js:
$(function(){
	var currentUrl = window.location.href
	...
	var regex = /.*\/post\/\d+.*/
	if(currentUrl.match(regex)){
		var pic = $('#bgImg').text();
		$("body").css("background", "url("+pic+") no-repeat center center fixed");
		$("body").css("-webkit-background-size", "cover");
		$("body").css("-moz-background-size", "cover");
		$("body").css("-o-background-size", "cover");
		$("body").css("background-size", "cover");
		$(".mainContent").css("background", "#fff");
		$(".mainContent").css("opacity", "0.9");
	}
});
I added #bgImg to the templates html, above says: if the current URL has /post/number in it (we’re on a quote page), get the pic and apply the background:cover CSS to body. Examples:
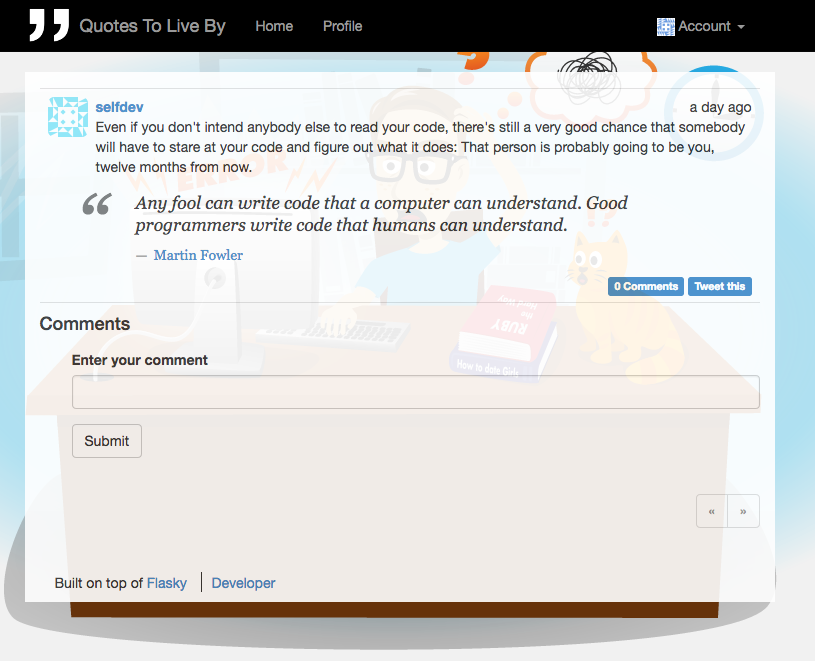
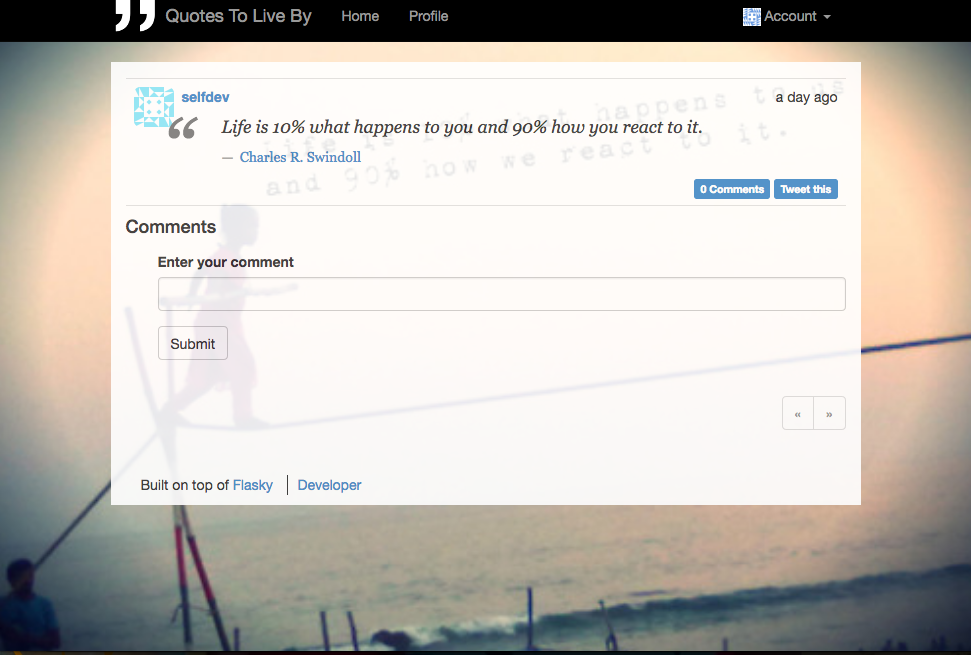
QOD gets the covers automatically from its source, at this time only Admins can add cover images to existing quotes.
Deployment to Heroku
Critical part, without getting this right you can never share your app. So I took some notes I will share here.
I recommend reviewing chapter 17 of the Flask Book alongside this because manage.py has a deploy() method that is used in this procedure. Also make sure you are in your virtualenv (source venv/bin/activate).
#  login and create app

$ heroku login
$ heroku create <appname>

# local DB = sqlite3, remote = Postgres, hobby is free Heroku version

$ heroku addons:create heroku-postgresql:hobby-dev
..
$ heroku pg:promote HEROKU_POSTGRESQL_PUCE_URL


# test the Heroku configuration locally

# test locally defining an .env file (and add it to .gitignore!)

$ more .env
FLASK_CONFIG=heroku
MAIL_USERNAME=<your-email>
MAIL_PASSWORD=<your-pw>
FLASKY_ADMIN=<your-email>
FLASKY_MAIL_SENDER=<your-email>

$ pip install gunicorn

$ gunicorn manage:app


# define dependencies (requirements.txt)
$ pip freeze > requirements.txt

# Procfile tells Heroku how to start your app
$ echo “web: gunicorn manage:app” > Procfile

# specify the Py version to be used
$ echo “python-3.5.2” > runtime.txt

# setup remote env variables

heroku config:set FLASK_CONFIG=heroku
heroku config:set FLASKY_ADMIN=<your-email>
heroku config:set FLASKY_MAIL_SENDER=<your-email>
heroku config:set MAIL_USERNAME=<your-email>
heroku config:set MAIL_PASSWORD=<your-pw>
heroku config:set SLACK_USER=<your-user>
heroku config:set SLACK_WEBHOOK_SECRET=<your-secret>

# push code to Heroku
$ git push heroku master

# deploy

$ heroku run python manage.py deploy
$ heroku restart


# review logs
$ heroku logs (-t)

# to upgrade
$ heroku maintenance:on
$ git push heroku master
$ heroku run python manage.py deploy
$ heroku restart
$ heroku maintenance:off


$ postgres backup:
GUI: https://data.heroku.com
CLI: heroku pg:backups capture --app <app>

# restore locally
pg_restore -C  <file-name>

# to connect to remote DB directly:
heroku pg:psql DATABASE_URL --app <app>

# learned some postgres:
- show tables:
qtlb::DATABASE=> \dt;
- update sql queries:
qtlb::DATABASE=> UPDATE users SET role_id = 3 WHERE username = 'bob';
Conclusion
Having the Flasky app readily available was a great learning experience. It also shows the power of open source, you can stand on the shoulders of giants and extend good pieces of software to your liking. I am still reading the Flask book to fill in the theoretical gaps, and I highly recommend it for its clarity and good practices. Working towards a complete app, adding features, I learned a great deal. I hope you enjoyed this post and let me know when your build anything cool with Flask or share any thoughts in the comments below.
- Python (7) ,
- Flask (1) ,
- API (1) ,
- Heroku (1) ,
- Slack (1) ,
- QTLB (1) ,
- quotes (2) ,
- Javascript (2) ,
- CSS (2) ,
- design (11)
