My Reading List improved - a quick tour of its new features

I have further tweaked the My Reading List Facebook app. In this post a quick tour with printscreens of its new features.

featured image

This has been promoted to one of my favorite web/programming projects now :) The Google Books API does a great job in providing rich content for a wide range of books. With the integration of the Amazon customer reviews and the info My Reading List users are adding, it is becoming a powerful tool to share your reading and inform yourself about potential next reads and/or book purchases. With this new release, it is easier to find and add new books to your list. You can find much more info per book. And the overall look and feel have been improved as well. A quick tour what is new:
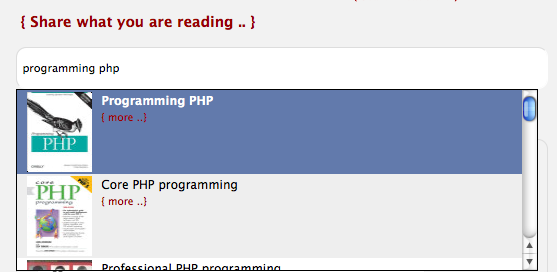
3-way autocomplete

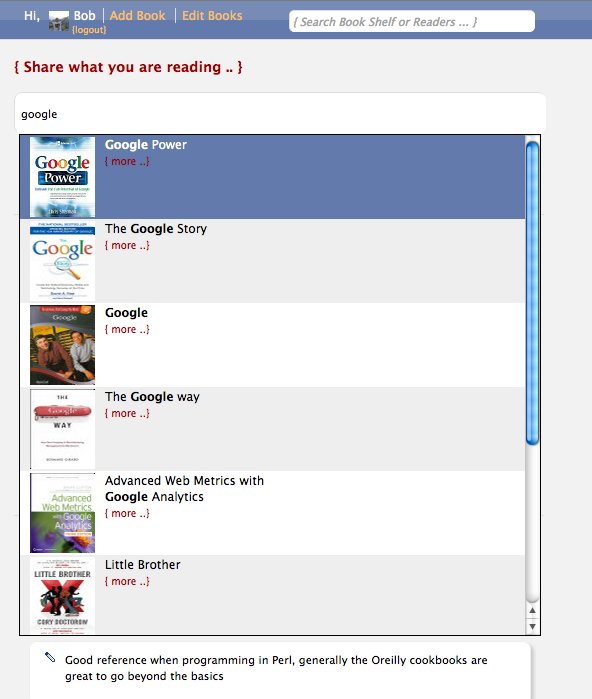
When you search a book from the search box in the header you get a result devided in: 1. books already added and by who, 2. books not added but found by the Google Books API with a link to add them, 3. matching usernames for the search string sorted descending on the number of books added:

autocomplete gives 3 results back

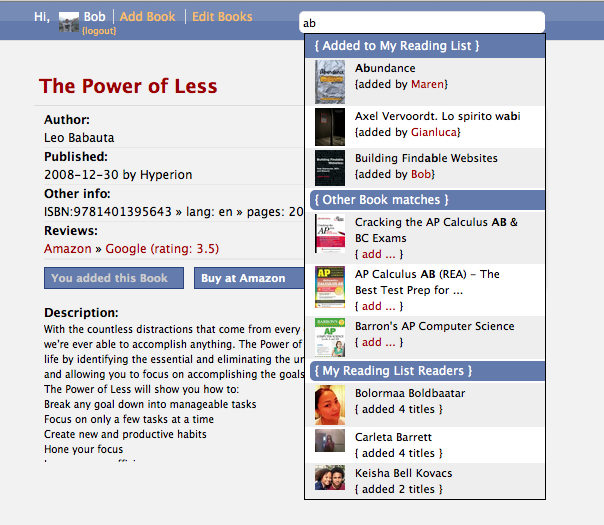
The "adding book" autocomplete search box

... is always visible now. It was hidden behind an "add book" button. This was not necessary so I made it always visible at the top of the homepage:

add book always visible

When you select a book from the autocomplete a form slides down to add it to your reading list:
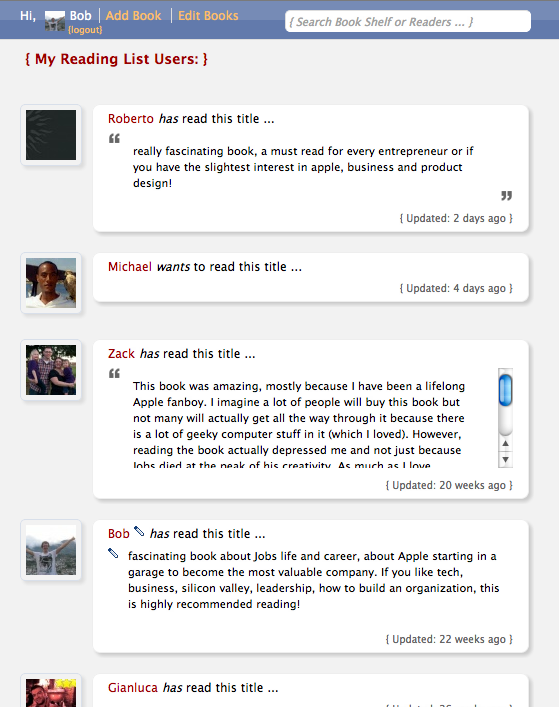
when selecting a book

Edit everywhere

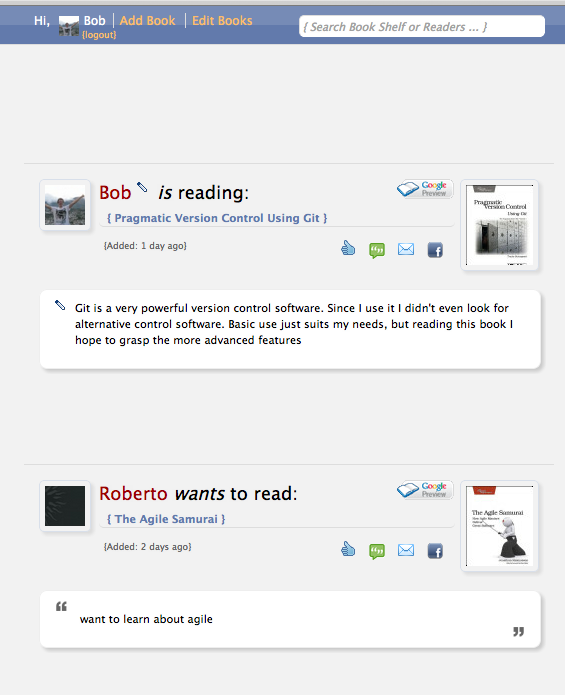
Instead of one edit place, the app shows you click-to-edit buttons (nice jQuery plugin) everywhere it detects a book from you:

edit everywhere

Easier to find your books

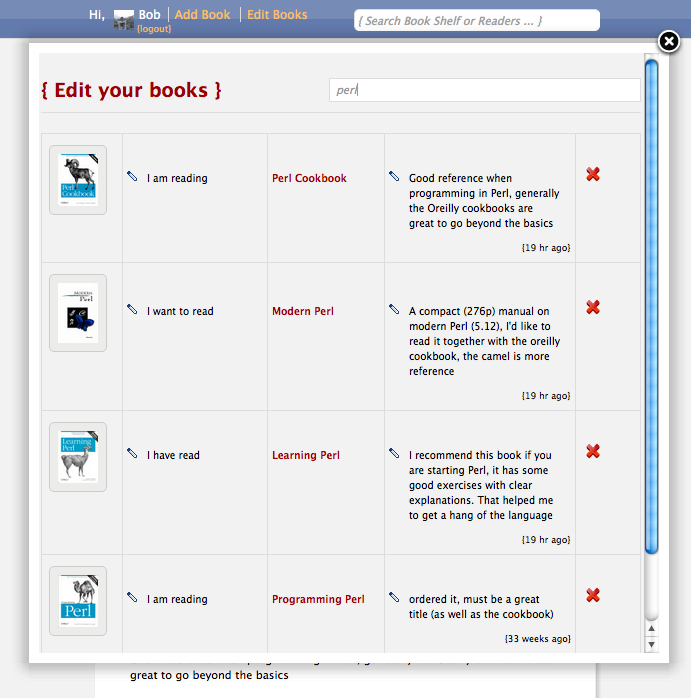
After some time you can build up quite a reading list. When you click on "Edit Books", you get an overlay with your books. At the top you find a filter box that, when you start typing, show you matching titles on the fly:

edit iframe - filter box

New book pages

Each book has a page with more info than before, apart from the Amazon reviews, this data comes from the Google Books API:

book pages iframe

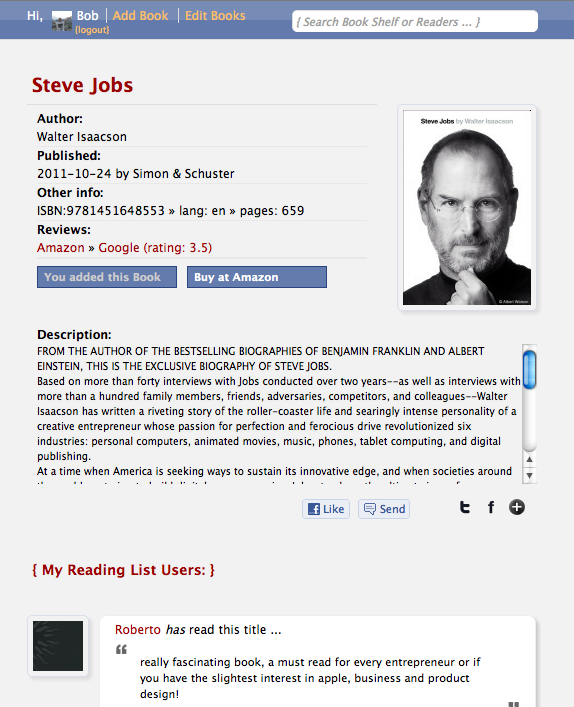
And as more people start adding books, sometimes you see multiple reviews from My Reading List users for the same book (Steve Jobs bio as an example here)
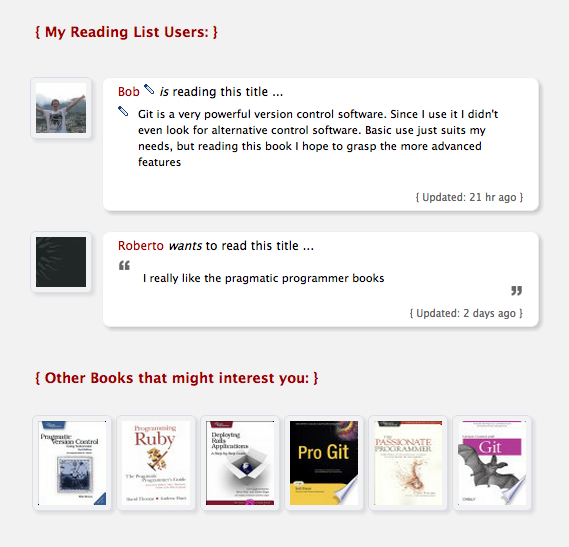
what my reading list users say about the book

Similar books

Google Books API can be queried for similar titles, that is what I integrated further down the book pages (example for a book about Git version control software):

similar titles

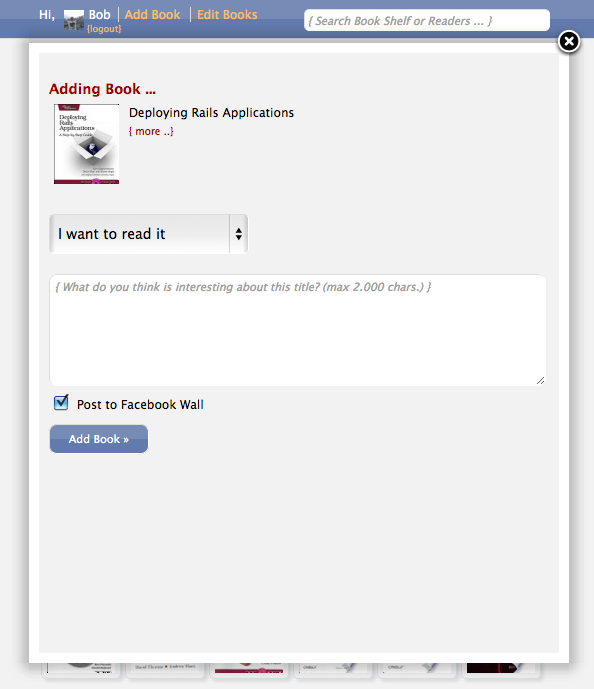
Easily add books to your reading list

... from the book page, if you click the "Add to My Books" button, you get an overlay identical to the "add book" form we saw before. When you add it with or without review, the overlay closes, the page refreshes and you are linked to that book.
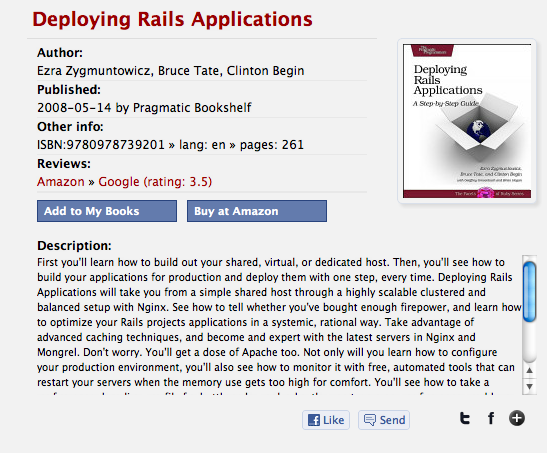
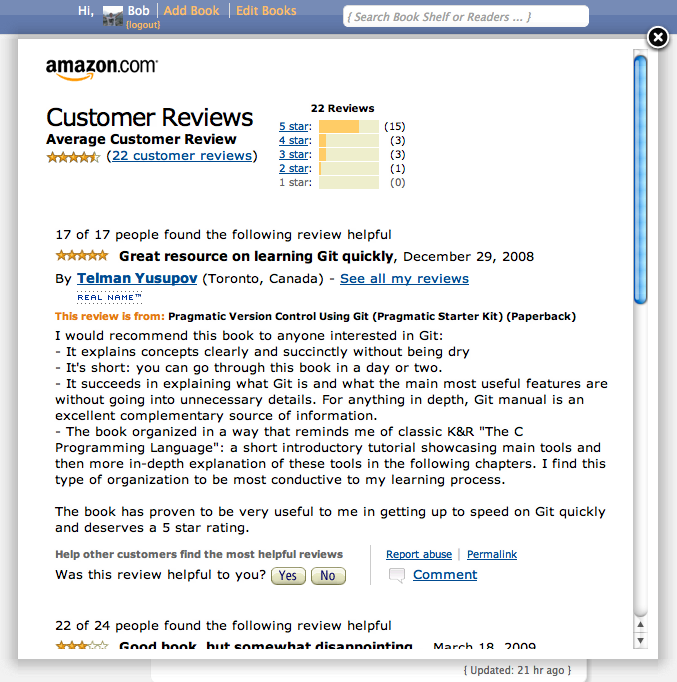
add book from page
overlay to add book

Amazon reviews

Last but not least, and one of my favorites: integration of Amazon customer reviews. I really wanted this feature to be integrated! Today I had some time to check out the Amazon Product Advertising API. It had some nice technical challenges which I will dedicate another blog post to. If the app manages to get an iframe URL with reviews it is visible on the books page. There is also a link to the Google Books reviews (different sources is a good thing!) and a link to buy the book at Amazon:

amazon reviews are there (YES)

Where is it?

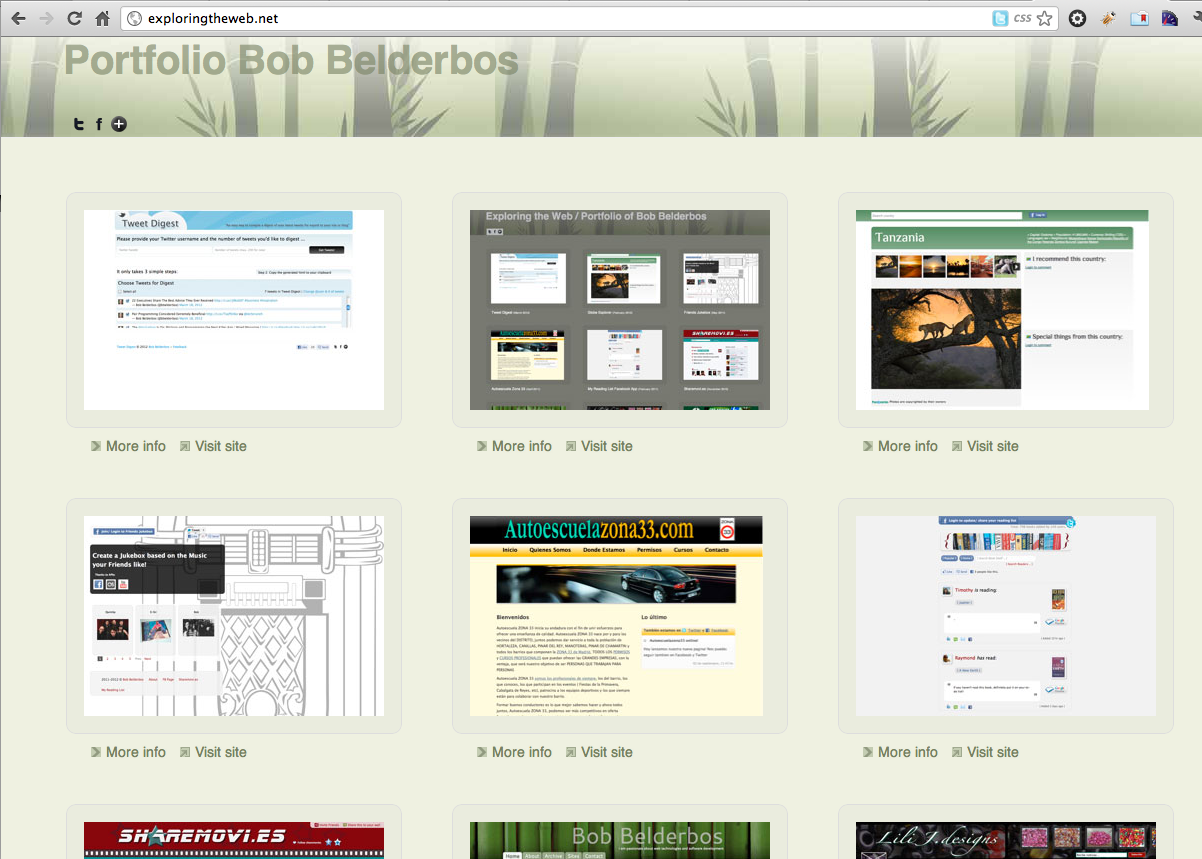
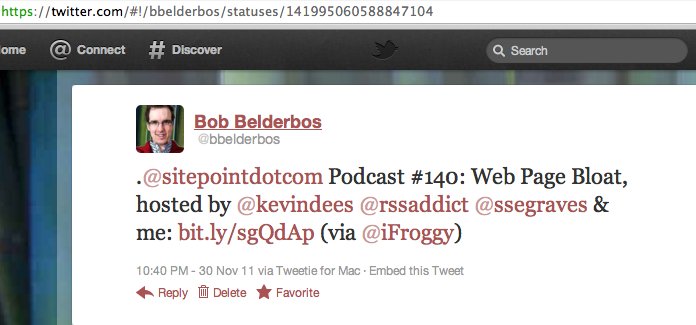
As mentioned in my last post I put My Reading List on its own domain now. You can subscribe to updates by following the My Reading List Facebook page. All new titles that get added are streamed to Twitter as well.

Previous blog posts

If you have doubts or questions, or you just want to know more about this app and its feautes, I have been blogging about it for a while now (descending order):

New release My Reading List - fbreadinglist.com

I picked up development again for one of my favorite projects: My Reading List. In this post the new features for current release 1.1

New features / improvements

featured image

  • My Reading List is now hosted on its own domain: fbreadinglist.com . All bobbelderbos.com/books... links should be redirected (301) to the new domain
  • User data: no email storage in the My Reading List database, I only use the email once (from the Facebook session) to send a welcome email with links and as an option for the user to provide input (early user feedback is really valuable)
  • Post to FB wall is opt-in instead of opt-out. Although it was always clearly visible in the "add book" form, I think it is better to let users actively toggle the select box when they want to post. - It is opt-out in the end, because I think one of the purposes of this app is to sharewhat you read, so the FB wall post is something to encourage. However, it is clearly visible when adding books (see below), you are in control!

    Moreover FB built in some granularity it didn't have before: now you accept a FB app, and you have to explicitly accept the "post to wall" permission as a 2nd step.

  • Slight changes in the querying of the Google Books API: putting a % instead of a + between the words yielded me books I couldn't find earlier, even putting % before and after the keywords helped, I also cropped duplicate titles, because the first hit is usually the book (googleID) with the most reviews/data, so that is the one you want users to grab from the autocomplete.
  • URL txt-to-html conversion in the book comments (for example )
  • See same URL for improved share buttons, like my blog they take you outside of the page to sharer URLs where you have more options to customize your sharing.
  • Better og: properties to share books with their appropriate thumbnail.
  • The Facebook Canvas App is back.
  • Some small cleanups in the design, but overall I left it the same, because I think it is simple and clean. It also fits perfectly in the smaller width of the FB Canvas.

Next

  • I'd love this to be available on an iphone and/or ipad!
  • Provide / link more info for each book. It would be great to fetch Amazon reviews. Personally I use those a lot deciding whether to read and/or buy a new book.

Book review: Sencha Touch Mobile JavaScript Framework

Disclaimer: I received a copy of this book from Packt to review

I finished reading a copy of Sencha Touch Mobile JavaScript Framework that Packt Publishing provided me with. In this post a review of the book.

What is this book about / what will you learn?

See also packtpub:

Overview

  • Learn to develop web applications that look and feel native on Apple iOS and Google Android touchscreen devices using Sencha Touch through examples
  • Design resolution-independent and graphical representations like buttons, icons, and tabs of unparalleled flexibility
  • Add custom events like tap, double tap, swipe, tap and hold, pinch, and rotate
  • Plenty of well-explained sample code with the essential screenshots added in for thorough understanding

You will learn:

  • Make use of technologies such as HTML5 and CSS3 to provide native-quality application experiences without the need for plugins
  • featured image

  • Create a sample application using Sencha Touch that will run on Apple iOS and Google Android
  • Efficiently use the list of components available in Sencha Touch framework libraries such as tab panels, scrollable list views, and toolbars
  • Add custom touch events like tap, double tap, swipe, tap and hold, pinch, and rotate
  • Discover the rich event communication that is available in every Sencha Touch component, allowing you to quickly respond to your users and create intuitive, native-quality applications
  • Completely control the look of your application with Sencha Touch themes and styling options.
  • Quickly put together simple components backed by the data package
  • Allow your users to store information with forms, or access remote information from other services like Google maps and Flickr
  • Learn about web storage features to store data offline, or communicate with online databases for richer storage options.
  • Explore expert topics like syncing data and compiling applications for sale on an App store.

My review

++ Easy accessible

The entry level is low, somebody with a general idea about touch devices and having some HTML/CSS skills, preferably also some knowledge of Javascript, can jump in with great ease.

++ Clear and concise explanations

The explanations and code examples were comprehensive and well structured (one caveat with the code, see further down). Especially Chapter 8 was useful: it combined the concepts building a Flickr Finder app - cool.

++ Wide range of technologies make it an interesting read

Apart from Sencha Touch a lot of other technologies are introduced like writing CSS with SASS, the Safari Error console, REST / building an API and AJAX, PhoneGap/ NimbleKit, working in offline mode. I liked this, it gives you some relevant context you need as a developer.

- - All code == Sencha Touch 1.1.0, you want to use Sencha Touch 2.x !

Here is where the book lost a bit my appetite. It uses Sencha Touch 1.1.0 and this is not the latest release. Release 2.x is out and contains important changes. The Sencha Touch 2 Developer Preview was already presented in October last year, yet this book came out if February 2012. I don't understand it doesn't take a sneak preview at least as the Facebook graph title I reviewed did with the Open Graph that was even fresher when that book was released.

I noted that when I loaded the 2.x library files into the 1.1.0 code examples things started to fail. This demotivated me a bit because I didn't see any use in trying examples of an older release especially knowing that performance was the key improvement between 1.x and 2.x. I guess this is inherent to writing a book about any software topic, but I had expected a bit more here, knowing that Packt books are heavily focussed on practical code samples.

++ Overall: good book

That aside, as I already stated the material was presented in a clear and wide scope. It was an interesting and joyful ride to get familiar with the Sencha Touch framework. After reading I can clearly see this is a good approach to mobile web development. I am looking forward to dive into the release 2 documentation soon to actually build something myself.

More info

You can read more about the book here. Please let me know in the comments if you have any experience and/or example apps built with Sencha Touch.

Need to scrape a website? BeautifulSoup is your friend!

Beautiful Soup is a Python library to do screen scraping. I think it is a powerful tool which can be used in many situations. See here for examples where it is used. In this post I will show you two examples how to crawl websites using this library.

Get started

featured image

Best way to start is to download the latest source and start playing with the many examples from the documentation page. In this post I will scrape the paging of a Dutch tv program site. In the second example I scrape the data of top ranked artists. Another interesting one would be to replicate the Facebook sharer.php which shows you different thumbnails found on the page you want to share. Reddit uses BeautifulSoup for this as well. Maybe a nice exercise for you?

2 practical examples

As you can read and practice yourself with above links, without further ado the two examples:

6 lines to get all RSS feeds of uitzendinggemist.nl

One of my future plans is to build an iphone app to see programs from Dutch television. I couldn't download the existing "uitzendinggemist" app because Apple only gives you access to one store per credit card, mine is Spain. I didn't actively look for a workaround, however this limitation is actually good to start building something myself. I will need to leave it for the future due to current work, but the below example gets me at least all RSS feeds which are hidden behind a paging navigation of 93 pages, see http://www.uitzendinggemist.nl/programmas/

  #! /usr/bin/env python

  import urllib
  from bs4 import BeautifulSoup as Soup
  base_url = "http://www.uitzendinggemist.nl"
  program_url = base_url + "/programmas/?page="

  for page in range(1, 93):
    url =  "%s%d" % (program_url, page)
    soup = Soup(urllib.urlopen(url))

    for link in soup.find_all(attrs={'class': 'knav_link'}):
      print link.get('title').encode("utf-8")," :: ",
      print "%s%s.rss" % (base_url, link.get('href') )

download

Notes:

  • For version 4 the import statement is : from bs4 import BeautifulSoup as Soup
  • soup = Soup(urllib.urlopen(url)) -> holds the whole page
  • the for loop retrieves all elements with the "knav_link" class (you should look at the HTML source while coding) and gets the title and href attributes.

Get details about top ranked artists

This example is a little bit more challenging because we have to do more parsing on the HTML. See http://www.musicrow.com/charts/top-ranking-country-artists/: we want to get the name, twitter/facebook page, number of likes/followers of top ranked artists. Moreover, we want to save that data into a database table.

  #! /usr/bin/env python
  import urllib
  from bs4 import BeautifulSoup as Soup
  from time import time
  import MySQLdb

  db = MySQLdb.connect("localhost","bob","cangetin","bobbelde_models" )
  cursor = db.cursor()

  url = "http://www.musicrow.com/charts/top-ranking-country-artists/"
  soup = Soup(urllib.urlopen(url))

  for row in soup.find_all(attrs={'class': 'row'}):
    artist = [text for text in row.stripped_strings]
  
    name = artist[1]
    followers = artist[5]
    likes = artist[7]
  
    thumb = row.select("img")[0]['src']
    twitter = row.select("a")[0]['href']
    facebook = row.select("a")[1]['href']
    tstamp = int(time())
  
    sql = """INSERT INTO top_ranking (id, name, followers, likes, thumb, 
            twitter, facebook, audit_who, audit_ins, audit_upd) VALUES
            (NULL, '%s', '%s', '%s', '%s', '%s', '%s', 'admin', '%d', NULL);
            """ % (name, followers, likes, thumb, twitter, facebook, tstamp)
  
    try:
      cursor.execute(sql)
      db.commit()
    except:
      db.rollback()
      db.close()
  

  db.close()

download

Notes:

  • We loop through all elements with class "row" which are the table rows in this case
  • artist = [text for text in row.stripped_strings] -> strips away all html and leaves us with bare text only. This gets us almost everything except the thumb "img src" attribute and the Twitter and Facebook URLs. Hence the extra row.select("..")[0]['...'] statements. This does the job, but I expect that a BeautifulSoup ninja would use less code to get this :)
  • We concat all together and execute the insert statement. See this article to get started with MySQLdb.

More examples?

I hope you enjoyed this post. If you have interesting use cases yourself, I invite you to share them in the comments ...

Exploring the web: my new responsive portfolio site

Last week I finished my new portfolio design. It shows some websites I have built the last couple of years. As my blog I integrated bamboo in the design. There is a light and dark theme. And most important it is responsive: it is compatible with the iphone and ipad.

Before designing this portfolio site, I used a Wordpress plugin which was pretty good. The downside was that I could not fully control the look and feel of your portfolio. That's why I designed something myself!

I started to take screenshots with this nice command line tool.

Then I used the HTML5 boilerplate and reset.css to get optimal defaults. I use both tools for every site now, and it is really prevents headaches later on in the process. Big thanks to the developers of these tools!

The fetching of the works is done with PHP and a MySQL Database backend.

Functionality

featured image

  • Click on a thumbnail and you can browse through a carousel of all the works (done with Fancybox).
  • Under each work is a link to its page which is a slug based on the website's URL (for example exploringtheweb.net/bobbelderboscom). Clean URLs is another practice I use often and are done with a simple RewriteRule in .htaccess. On the work's page you can read about the site, browse to the next/previous project, etc. It also links to any related blog if it exists. Examples: Friends Jukebox or Globe Explorer
  • In the footer there is a Feedback link that slides a Facebook Comment box open when clicked. You can also change the theme from: light to dark or vice-versa in the footer of the site. This sets a session variable and/or cookie to remember the theme you have selected. I first had the themes toggle each day when you'd enter the site, but I decided that I liked the light one better, so I left that as the default.

Media queries

As discussed earlier on my blog media queries can be quite powerful. I only made basic use of them, yet with sufficient result: the portfolio site supports ipad and iphone! It is done by targeting different stylesheets upon detection of the device width of these devices:

<link rel="stylesheet" href="css/iphone.css" 
  media="only screen and (max-device-width: 480px)" type="text/css">
<link rel="stylesheet" href="css/ipad.css" 
  media="only screen and (min-device-width : 768px) and (max-device-width : 1024px)" 
  type="text/css">

These stylesheets then overwrite / add styles on top of the main styleseet.

Below you can see some printscreens how the site scales on different devices:

1. Benefit screen estate: the Desktop

You see that the wider your screen the more works you see. This is done with a simple left float.

Homepage:

portfolio desktop picture 2

Homepage resizing the browser:

portfolio desktop picture 3

This is the experience of looking at a work's site:

portfolio site picture

You see the description is at the left side, where on mobile devices it moves on top of the image.

2. Go smaller but mobile: Ipad

Ipad has two columns per default on the homepage.

portfolio - ipad - picture 2

On the work pages you see the text scales above the picture:

portfolio - ipad - picture 1

3. In your pocket, but be compact: Iphone

On the Iphone the homepage has a single column of works:

portfolio iphone picture 1

Secondly on a work's page the text is also placed above the image. Note that also the header is smaller to gain screen estate:

portfolio iphone picture 2

Also note that the header has a fixed position so content scrolls behind it. See here how I did this. It is one of the details I like most about this design.

Let me know if you have any comments or suggestions. A followup plan could be to extend this site to let:

  • users create their own portfolio site, potentially with a subscription option to have your unique URL at http://exploringtheweb.net. A challenge is how to process portfolio images, you take them with a tool like webkit2png which generates pretty heavy images, or you let your users upload their images. I think the latter is most practical in the end. I had to manually optimize the images for the web, because they were taking too much time to load.
  • users edit the default design with a theme builder so that they can leverage the power of this layout but with customized banners, colors, fonts, etc.

How to make a fixed sidebar or header with CSS

In this post some simple CSS to get you started with a fixed sidebar or header design. I think it is a nice design option. I used the fixed header for my portfolio site. I found a fixed sidebar example at fooljs.com.

featured image

I like how Facebook and Twitter have a header with small height and how it always stays on top and in place when you are scrolling the content. In this post I will give you an example of this and of a fixed sidebar. The code can be downloaded from github or, as it is HTML/CSS, you can browse the files here

** I will use the Codesnippets repository on Github from now on to share blog and other code examples. I will migrate some of the code I have at http://bobbelderbos.com/src (previous posts) to have everything stored in one place.

Start clean

I first include a reset.css to wipe out any browser default styles. I think this is one of the best things you can do when starting to write CSS, to not find any surprises ("huh? it looks different even between modern browsers!") later on.

Next, you can get a simple HTML5 template from this Sitepoint post. For bigger projects I tend to use the HTML5 boilerplate which includes a lot of best practices. So we are going to use some very simple markup, to provide the CSS necessary to get to these two layouts.

The markup

See here. We have a "nav" item that is the fixed content, a "content" div that holds "main" and "footer".

	<nav>
	<h1>Fixed header</h1>
	<h2>Subheader</h2>
	<ul>
	..
	</ul>
	</nav>

	<div id="content">
		<div id="main">
			..
		</div>
	
		<footer>
			..
		</footer>

	</div>

Where are my content blocks?

A simple trick I use regularly is to put temporary borders around the building blocks of my sites:

  /* markers for design */
	nav {
		border: 1px solid #999;
	}
	#content {
		border: 1px solid red;
	}
	footer {
		border: 1px solid blue;
	}

CSS fixed sidebar

See here

  nav {
  	position: fixed;
  	left: 0;
  	top: 0;
  	bottom: 0;
  	background: #f2f2f2;
  	width: 180px;
  	padding: 10px;
  }
  ..
  #content {
  	margin: 0 0 30px 210px;
  	background-color: #eee;
  }
  #main {
  	padding: 10px;
  	line-height: 20; /* to fake lot of content / scrolling */
  }
  footer {
  	width: 100%; 
  	background-color: #ddd;
  	position: fixed;
  	bottom: 0;
  	left: 200;
  }
  • The position: fixed; in nav is responsible for taking the element out of the document flow and stick it to the position that you specify by left/top/bottom.
  • You have to give a left margin to the #content that comes right of the fixed sidebar, in this case : the width of nav = 180px + its left and right padding = 2x 10px + and extra 10px = 210px total.
  • The footer spans the whole width: 100%. Same here: position: fixed; + bottom: 0; make it stick to the bottom. I gave it a background-color so that you cannot see the content underneath it. A half-transparent background for the footer like http://fooljs.com/ is a nice option as well.

CSS fixed header

See here

  nav {
  	position: fixed;
  	left: 0;
  	top: 0;
  	background: #f2f2f2;
  	width: 100%;
  	heigth: 20px;
  	padding: 10px;
  	z-index: 20;
  }
  ..
  #content {
  	position: relative; 
  	top: 40px;
  	background-color: #eee;
  	z-index: 10;
  }
  #main {
  	padding: 10px;
  	line-height: 20; /* to fake content with a huge height without much clutter content */
  }
  footer {
  	width: 100%; 
  	background-color: #ddd;
  	position: fixed;
  	bottom: 0;
  	left: 200;
  }
  • Same comment on nav as previous example, but I got rid of bottom: 0; and put a height (20px + 10px all-round padding = 40px) and width (100%) in so it is a small header bar across the whole width of the site, like Facebook
  • I positioned the #content under the header with position: relative; top: 40px;
  • Very important is the stacking of elements. Out of the box the #content would overlap the header when scrolling down:
  • overlapping content

    After setting the stacking order with z-index it is better. As w3schools explains: "An element with greater stack order is always in front of an element with a lower stack order."

    So by giving "nav" a bigger z-index it stacks on top of #content. Interestingly I found out last week that, if you use plugins like Fancybox you should be conservative with this value. They use 100 for z-index, so when using the max. of 9999 for a block, that block will always sit on top, be careful there!

    nav {
    	z-index: 20;
    }
    #content {
    	z-index: 10;
    }
    

    After this CSS it is much better:

    not overlapping after z-index

And that is it: two simple templates to start a web design with a fixed vertical or horizontal navigation.

An easy way to compile a Twitter digest for your site or blog

Little over a week ago I released Tweet Digest. It lets you create your Twitter digest in 3 simple steps. I used it today to publish a digest. I saved me time and offered me an easy way to customize the digest. In this post a bit more about the creation process.

Earlier experience and idea

featured image

I used a Wordpress plugin in the past to automatically post tweet digests to my blog, then stopped it for some time. I think in retrospect I was bothered with the plugin to be too automatic, although it is true that you could save a digest as a Draft first.

I thought it was a good idea to build something myself, to customize it how I wanted, and as a programming / design exercise of course. I hope other Twitter fans will find this useful as well.


Enriched HTML

The other day I saw that Twitter provides embedded HTML. This inspired me to use this markup to leverage the enriched display and functionality that Twitter adds with some Javascript.

tweet digest query

Interface

tweet digest query

    • At the right side you can copy the generated HTML. This is all you need to show your tweets with links to hashes, URLs and @users. However if you include the JS, you get an enriched view, see screenshot above and my last post for example. It is progressive enhancement at work: want to exclude the JS one day to speed up your page load, the tweets are HTML so will still be there. Apart from that you can get all the hashtags from your selected tweets. I usually put those in the teaser paragraph of my Wordpress post.

tweet digest more options

    • At the bottom there is a Feedback link, when you click it a div block slides out with the possibility to feedback via Facebook or Twitter.

tweet digest feedback


Source

You can see the source at github.

Pending solution: Twitter Rate limit issue

The only bummer is that I get a "Rate limit exceeded" pretty quickly from twitter :(

  http code returned by Twitter: 400

  Dump request: 
  string(150) "{"error":"Rate limit exceeded. 
    Clients may not make more than 150 requests per hour.",
    "request":"/statuses/user_timeline/bbelderbos.json?count=50"}"

Maybe they see multiple requests from this domain (IP) and block me for a certain interval. It is pretty random and only temporarily. However I am sure that I am making far less than 150 requests per hour ! (I deactivated another twitter widget on my blog to make sure I was not making any additional calls)

For the same reason I am not querying https://api.twitter.com/1/statuses/oembed.json?id=.. (more info ), I generate the HTML myself (good suggestion here).

Example:

html code


Next: wrap this in a WP plugin

Building WP plugins is something I want to learn. I also hope this could be a workaround for the rate limit issue, because generally 1 user uses it per blog (instead of multiple users for a single IP). Anyone having this issue plus a solution please let me know ...

Instantly search tweets from command line with PHP

In the previous post I showed a way to archive your tweets, in this post I do want to leverage the power of Twitter's search interface, now to instantly search through tweets from the command line.

You can receive each new post by subscribing via email or RSS.

featured image

I made a quick PHP script to query twitter search and check out who twitted what, when and from which source. Two advantages, 1 disadvantage:

  • I like working from CLI, it gives me options to filter the output and send it through pipes to other programs like sed/awk, lynx or even sendmail.
  • Sometimes you see a link go viral, but from which sources did users tweet? With this query you can easily see this.
  • One disadvantage, as stated in my last post is the short search span of twitter search: only 6-9 days.

The following script is the most basic form, you can easily expand this checking out GET search and Using the Twitter Search API. You might want to use getopt to let the script accept more command line options. Interesting additions might be : page and rpp for returning more results, since_id/ until to get a timeframe or zoom in on location with geocode.

A simple PHP script

   #!/usr/bin/php
   results as $item) {
     echo "$item->from_user_name ($item->from_user_id) ";
     echo "nt- tweeted: $item->text nt- via: $item->source";
     echo "nt- at: $item->created_at nn";
   }
   
   function getTweets($str) {
   	$url = "http://search.twitter.com/search.json?q=".urlencode($str);
     if(!$info = @file_get_contents($url, true)) {
   	  die("Not able to get twitter history for this stringn"); 
     }	
     $tweets = json_decode($info);
     return $tweets;
   }
   ?>

Pretty straightforward. Note that you could use yql but unfortunately it didn't always return results in my case. I found search.twitter to be more reliable.

The script is very easy, it just queries search.twitter, returns json, which we decode and loop. Use cases:

  • check who mentions my domain: $ php twitter_search.php bobbelderbos
  • or onother keyword: $ php twitter_search.php "kony 2012"
  • who is mentioning me?: $ php twitter_search.php @bbelderbos
  • with a hash (need to escape): $ php twitter_search.php #python
  • etc.

widget example

Now you can do all kinds of stuff with this data, like set up a cronjob to alert when certain patterns come by, mail yourself when you have a new mention, etc. (you can do this also in Twitter itself, but now you are in control :-)

You can build on top of this script as discussed earlier and pipe the results to powerful sed/awk/perl or whatever.

Raw data you get back:

   stdClass Object
   (
   ..
       [results] => Array
           (
               [0] => stdClass Object
                   (
                       [created_at] => Mon, 12 Mar 2012 17:20:11 +0000
                       [from_user] => KCITP
                       [from_user_id] => 80589393
                       [from_user_id_str] => 80589393
                       [from_user_name] => KC IT Professionals
                       [geo] => 
                       [id] => 179255478474383360
                       [id_str] => 179255478474383360
                       [iso_language_code] => en
                       [metadata] => stdClass Object
                           (
                               [result_type] => recent
                           )
   
                       [profile_image_url] => http://a0.twimg.com/profile_images/1143479908/kcit-twitter1_normal.jpg
                       [profile_image_url_https] => https://si0.twimg.com/profile_images/1143479908/kcit-twitter1_normal.jpg
                       [source][/source] => <a href="http://bufferapp.com" rel="nofollow">Buffer</a>
                       [text][/text] => How to push your code to your remote web server with Git  http://t.co/om2hAHEK
                       [to_user] => 
                       [to_user_id] => 
                       [to_user_id_str] => 
                       [to_user_name] => 
                   )

A simple script to archive your tweets

Twitter's search API only goes back 6-9 days. In this post I explore a way to get my full twitter history to quickly search for what I tweeted. This way I can keep using Twitter as a way to not only share but also as a reference tool for things I am learning.

featured image

There are good solutions out there to get your tweet history, see this article for example or snapbird. So there is no lack of tools, but as usual, I want to give it a try myself :)

Besides, if you want to have full control you might want to consider importing your tweets yourself. This post is a first attempt but let me say upfront that it is far from done. It is an idea to be further worked out. The nice thing is that you get a bulk of data back which is good material to ask and solve many questions your own way:

  • At what time intervals do I tweet most?
  • More interesting: what hashtag do I use most? With which other twitter users do I interact most?
  • Simply build a search interface to search for stuff I need like a bookmarking tool (see at the end of this post).
  • Etc.

All those questions you get probably answered by online apps around Twitter, but hey ... it's a learning excercise as well. An important limitation is that you can get max. 3200 tweets, for me that is ok, because I am still far below that number. It is still a lot of data though :)

A very simple Python script to start

   #! /usr/bin/env python
   # script to import tweet history via twitter's timeline pagination
   import urllib
   import simplejson
   import pprint
   
   user = "bbelderbos"  
   count = 100 # best result 
   pages = range(30)
   
   for page in pages:
     queryUrl = "https://twitter.com/statuses/user_timeline/"+user+".json?count="+str(count)+"&page="+str(page)
     result = simplejson.load(urllib.urlopen(queryUrl))
     #pprint.pprint(result)
   
     for tweet in result:
       print tweet['id_str']+" :: "+tweet['text'].encode("utf-8")+" :: "+tweet['created_at']

Note that user_timeline shows 200 results as max, but that doesn't mean you always get that number. I found out it is safer to just query more slices of 100!

Use: $ python import.py > all_tweets_username

Ways to enhance this script

  • First off, this is one of the first scripts I wrote in Python, almost an "hello world" for me in this language. Coming weeks I am going to dive into Python and I hope to share my experience with you on this blog ...
  • It is just a start to do the bulk import, an extension is needed to import new tweets via a cronjob (matching timestamp of last tweet, and append a file from that point on, etc.)
  • It should except command line arguments to input the number of pages, the user, output file, etc. You see why inventing this kind of exercises for yourself, gets you up and running quickly in a new programming language ;)
  • Install a database driver for python like MySQLdb and prepare DB import statements to let the script directly append the data to a DB table.

I did play around a bit more

This is one of the apps you could make with this data. I did a quick import (just text-based, so not putting it here, because the official way to go is really with "prepared statements") into mysql and I built a quick autocomplete with php, jQuery etc.:

autocomplete

I get my tweets instantly when I start typing and when clicking on a particular tweet, it will redirect the status page with the tweet:

result upon click

How to push your code to your remote web server with Git

Today a quick post on how to use Git to push your code to a remote location. I found this very useful when developing sites. Welcome to post #100.

featured image

I learned this from Using Git to manage a web site and after using this technique at 2 websites, I found this needed to have a dedicated post. The article explains it very well, but this note taking helps me to remember and implement it well. And you guys might find this quite useful :)

Note that it is highly recommended to set up a key-based login to your remote server, see this useful SSH reference for more details.

Steps from local git to remote mirror

  • On the local server you begin with your project and commits, see my first Git post how to get started if you are not familiar with Git.
  • On the remote node you start by creating a new repository (assuming ~/repositories as the home of all code repos):
  • $ cd ~/repositories && mkdir repository.git
    $ cd repository.git
    $ git init --bare 
    

    You will see something like: Initialized empty Git repository in /home/user/repository.git/ and it means you have a new repository to mirror the local one to.

  • Make a destination directory where your code will be copied to:
  • $ mkdir /home/user/target_dir 
    
  • Create the following script that will take care to check out the latest copy in the source target directory (/home/user/target_dir) when you commit to the remote server (with $ git commit aliasName ; see towards the end of this post ... )
  • $ vi hooks/post-receive
    

    Enter the following:

    # #!/bin/sh
    # GIT_WORK_TREE=/home/user/target_dir git checkout -f
    
  • And give the script execution permissions with:
  • $ chmod +x hooks/post-receive
    

    You can find a quick wrapper script at Github.

  • Back on your localhost:
    • Define a name of the remote mirror (replacing aliasName, user, domain.com and repository.git with your stuff ):
    • $ git remote add aliasName ssh://[email protected]/home/user/repositories/repository.git
      
    • Push the code to remote location, creating a new "branch" master there, the hooks/post-receive script causes the source code to be copied to /home/user/target_dir you defined earlier. So here we are pushing master to aliasName:
    • $ git push aliasName +master:refs/heads/master 
      
    • Following updates are easy:
    • After local committing with: $ git add . ; $ git commit -m "message" , you push your code to your remote mirror with: $ git push aliasName