The why and how of Globe Explorer's design change

I was not 100% happy with the first design of Globe Explorer, but now I am. In this post some screenshots and inside info of the new design. I hope you like and enjoy it ...
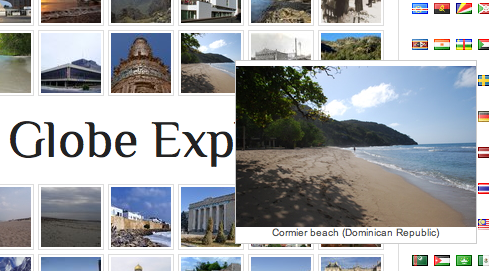
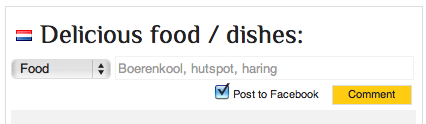
First design

This was the first design I presented two weeks ago:

first design

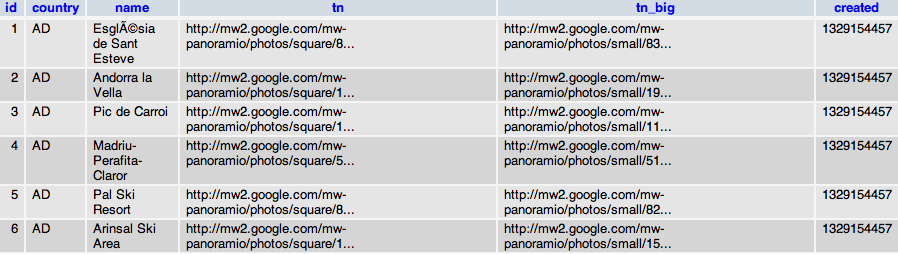
There were some issues with this design. First of all the Tixik API mapped photos to various countries. I addressed this to them, but I am waiting for an answer ... So not all photos were accurate. Secondly I loaded a lot of photos per country which might have slowed down the experience for users with a slower internet connection.
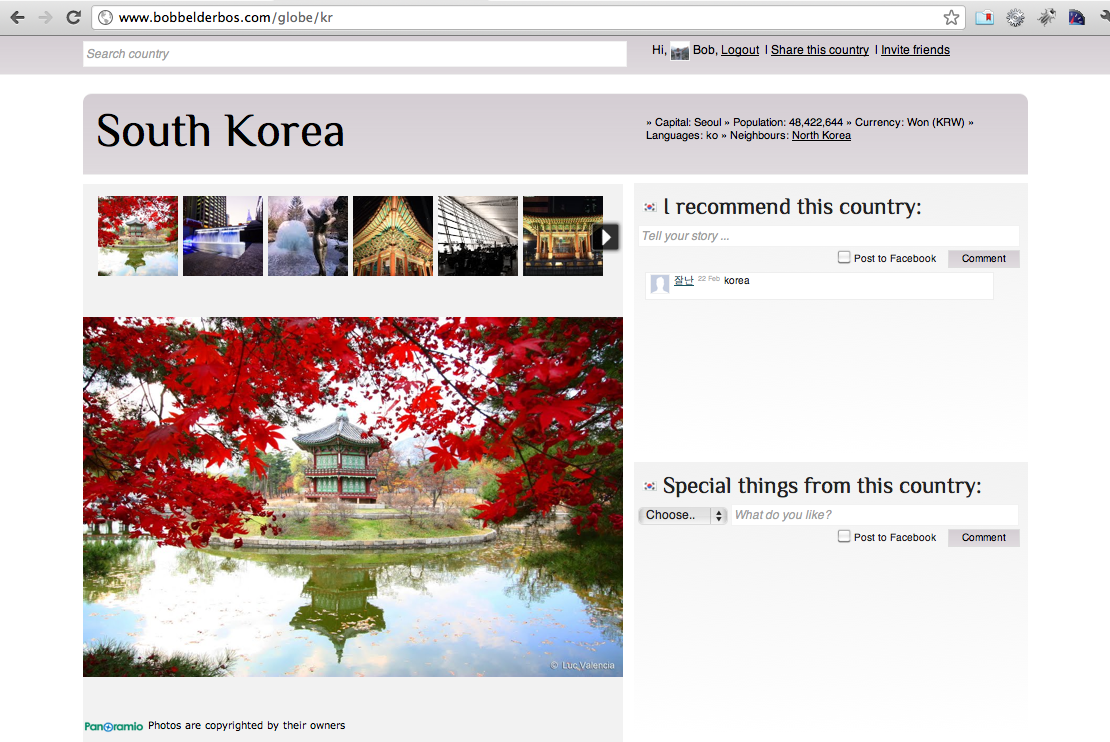
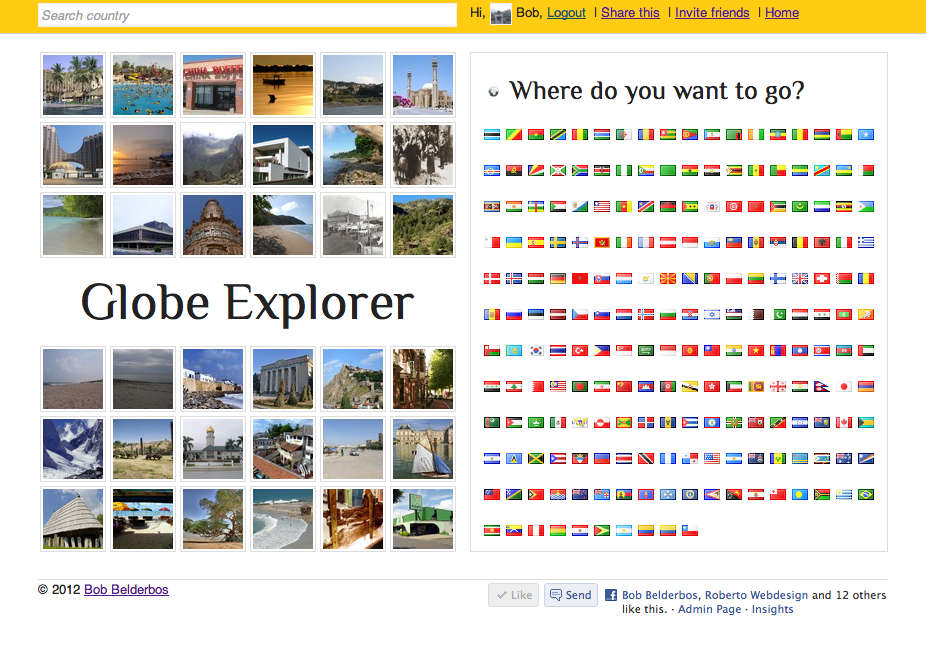
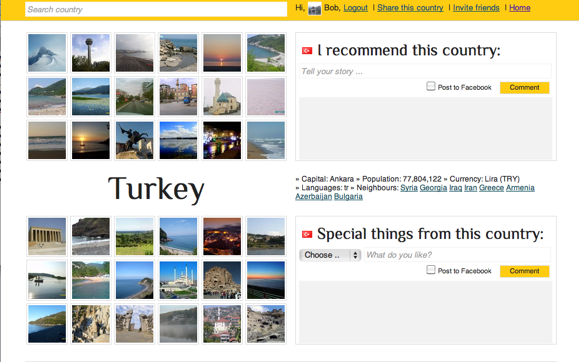
New design

I improved quite some things I think:

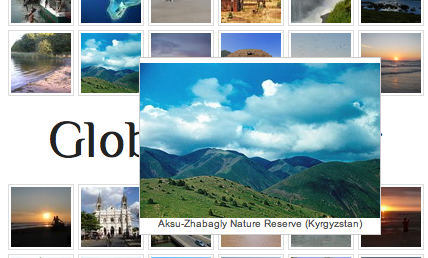
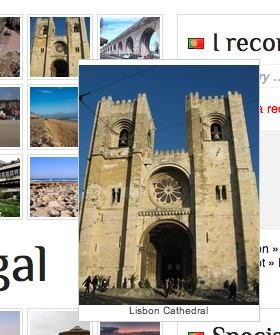
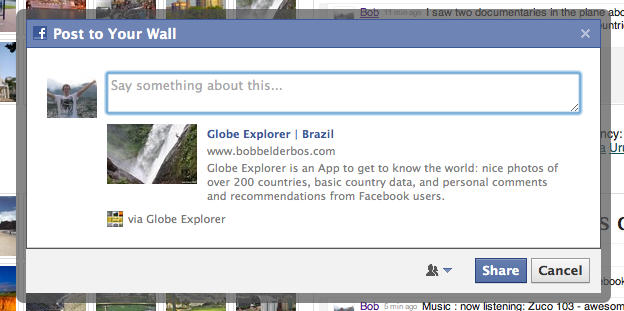
  • I found a very easy alternative for the image issue. I saw that most photos were linked to Panoramio, so I went out to see if I could talk to this source directly. Honestly, I didn't even use the Javascript API because I was pretty impressed with the widgets they offer. I use the photo_list widget with the countryname as variable:
  •   	<iframe id="panoramio" src="http://www.panoramio.com/wapi/template/photo_list.html?tag=
      		<?php echo $countryAttributes[0]['country'];?>
      		&amp;width=600&amp;height=600&amp;list_size=6&amp;position=top&amp;bgcolor=%23f2f2f2" 
      		frameborder="0" width="600" height="600" scrolling="no" marginwidth="0" marginheight="0">
      	</iframe>
    
  • I made the design wider: 1050px
  • Country info is at the top, alongside the country name, which makes much more sense
  • I use gradients for the navbar at the top and the div that contains countyname and country specs. The color gets calculated based on the colors in the flag (average of these colors):
  •    $gradientColor = getFlagAverageColor($country); 
       ..
       function getFlagAverageColor($country){
         // http://stackoverflow.com/questions/1746530/get-image-color
         $filename = "img/flags/".strtolower($country).".gif";
         $image = imagecreatefromgif($filename);
         $width = imagesx($image);
         $height = imagesy($image);
         $pixel = imagecreatetruecolor(1, 1);
         imagecopyresampled($pixel, $image, 0, 0, 0, 0, 1, 1, $width, $height);
         $rgb = imagecolorat($pixel, 0, 0);
         $color = imagecolorsforindex($pixel, $rgb);
         return rgb2html($color['red'], $color['green'], $color['blue']);
       }
      
       function rgb2html($r, $g=-1, $b=-1) {
          if (is_array($r) && sizeof($r) == 3)
             list($r, $g, $b) = $r;
      
          $r = intval($r); $g = intval($g);
          $b = intval($b);
      
          $r = dechex($r<0?0:($r>255?255:$r));
          $g = dechex($g<0?0:($g>255?255:$g));
          $b = dechex($b<0?0:($b>255?255:$b));
      
          $color = (strlen($r) < 2?'0':'').$r;
          $color .= (strlen($g) < 2?'0':'').$g;
          $color .= (strlen($b) < 2?'0':'').$b;
         return '#'.$color;
       }
    

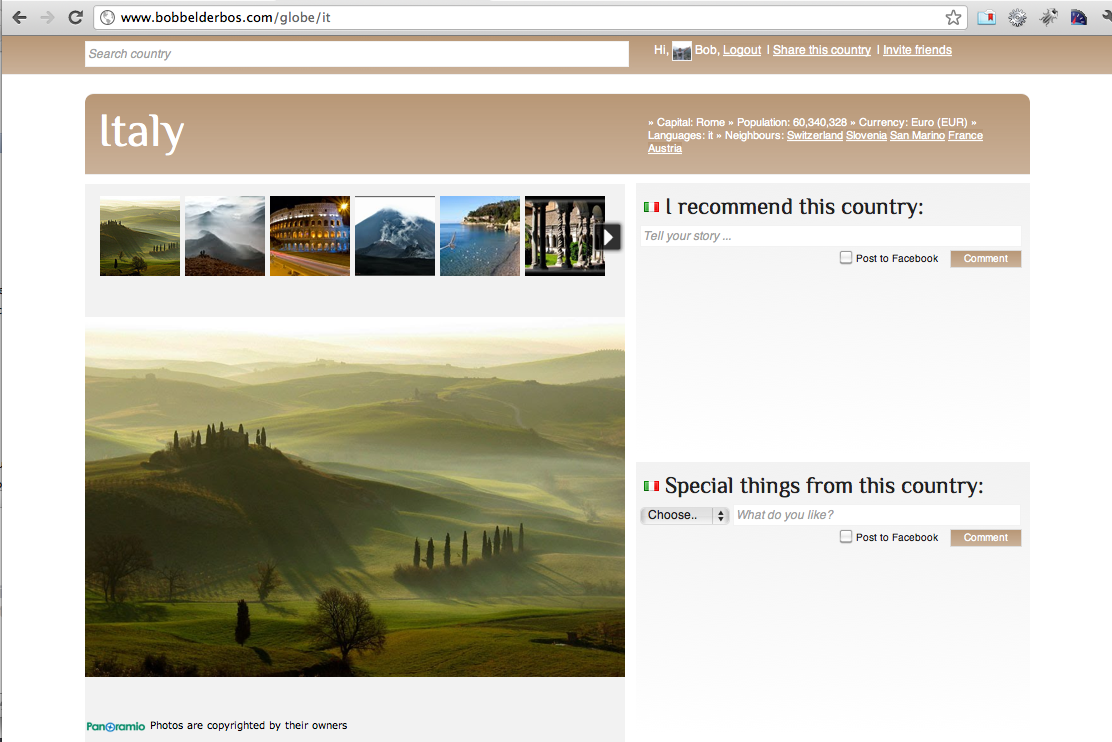
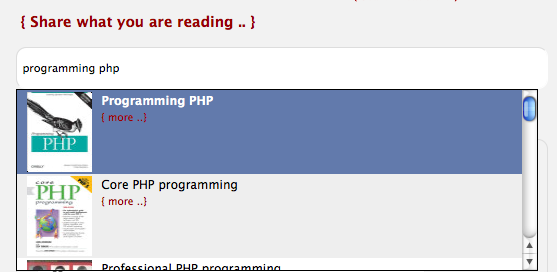
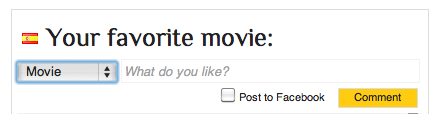
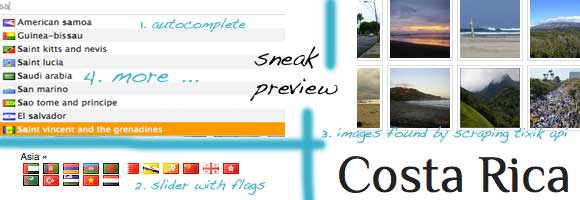
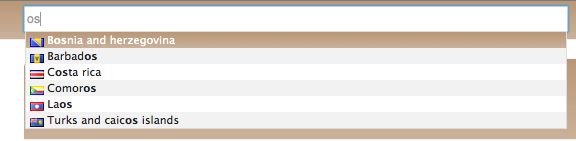
    I found a nice PHP class to calculate a lighter tone of that color. It also matches the foreground color to W3C color visibility guidelines. Quite neat! The calculated flag gradient also shows up in the autocomplete:

    autocomplete

  • featured image
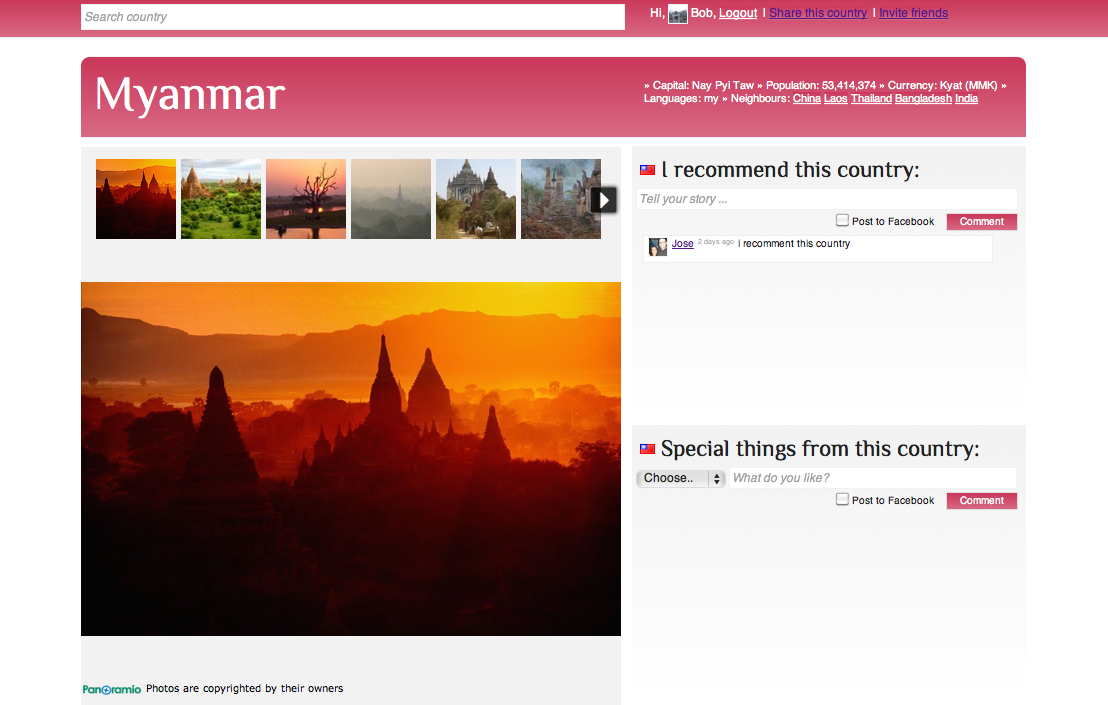
  • I took the homepage out. It had all the flags which was nice, but it didn't result in a fast load of the homepage. I do load the flags in the footer carousel, that did not change, but the potential delay does not jump in the eye (and if it does effect user experience I might get it out after all). I thought it was more fun to select some preferred countries, put them in an array and randomly select one and load its page. So now, when you go to the homepage, you get one of those preferred countries and you dive right in. Usually the specs show one or more neighbour countries so you can keep browsing countries. If not, I hope it is obvious you can use the search box at the top to lookup any country (or click on the flags in the footer).

Feedback

Before showing off some examples, please let me know if you have any feedback. I am open to any comments. Thanks for the designers that had a critical look at the first version. Especially the feedback on gradients was very useful. Thanks guys!
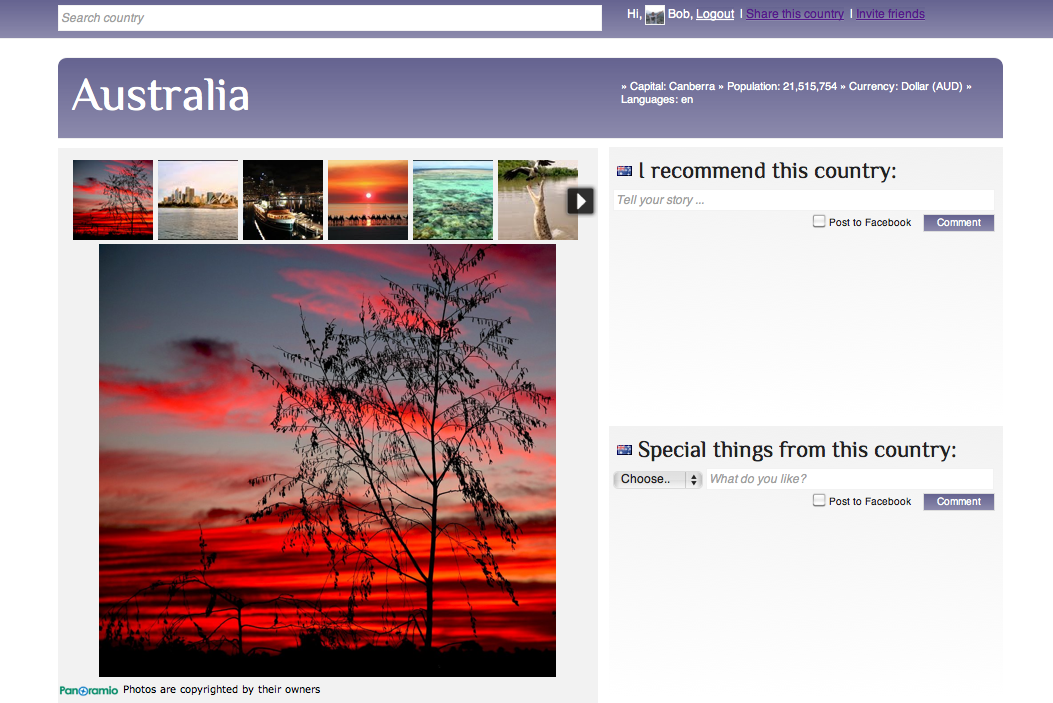
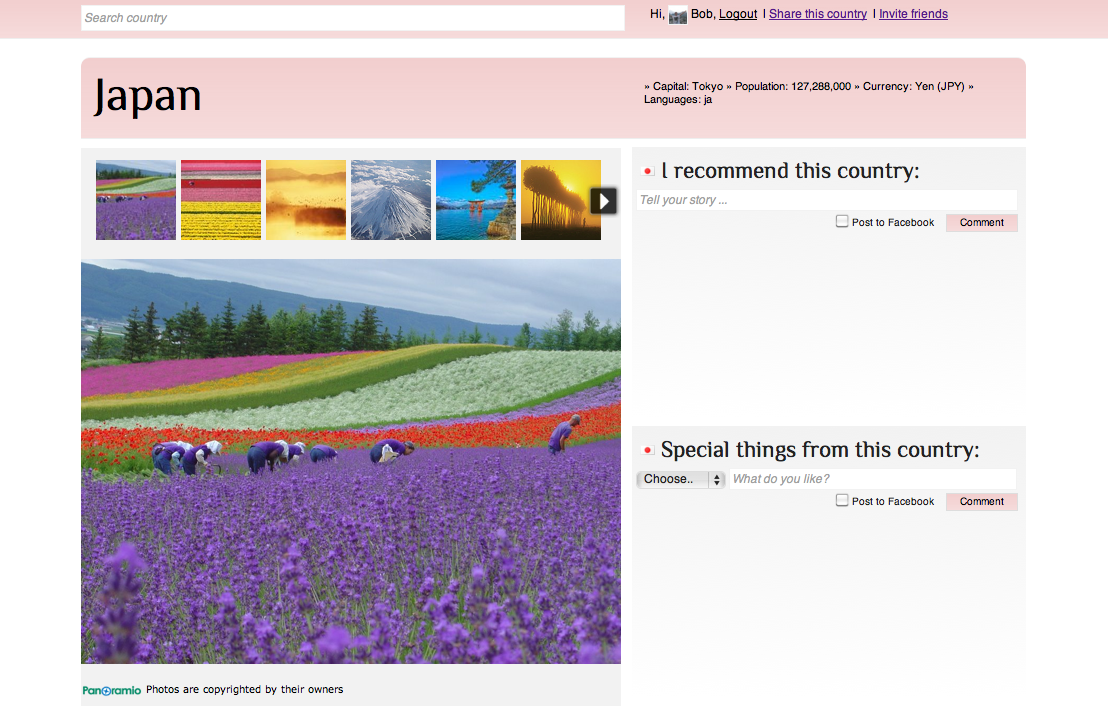
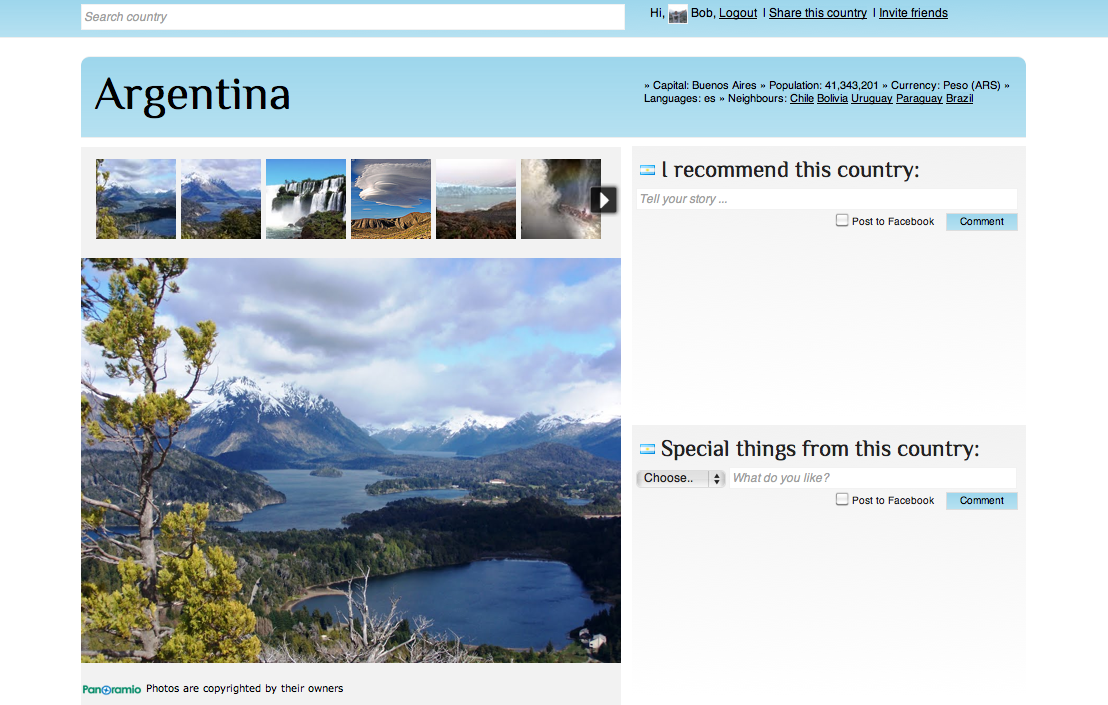
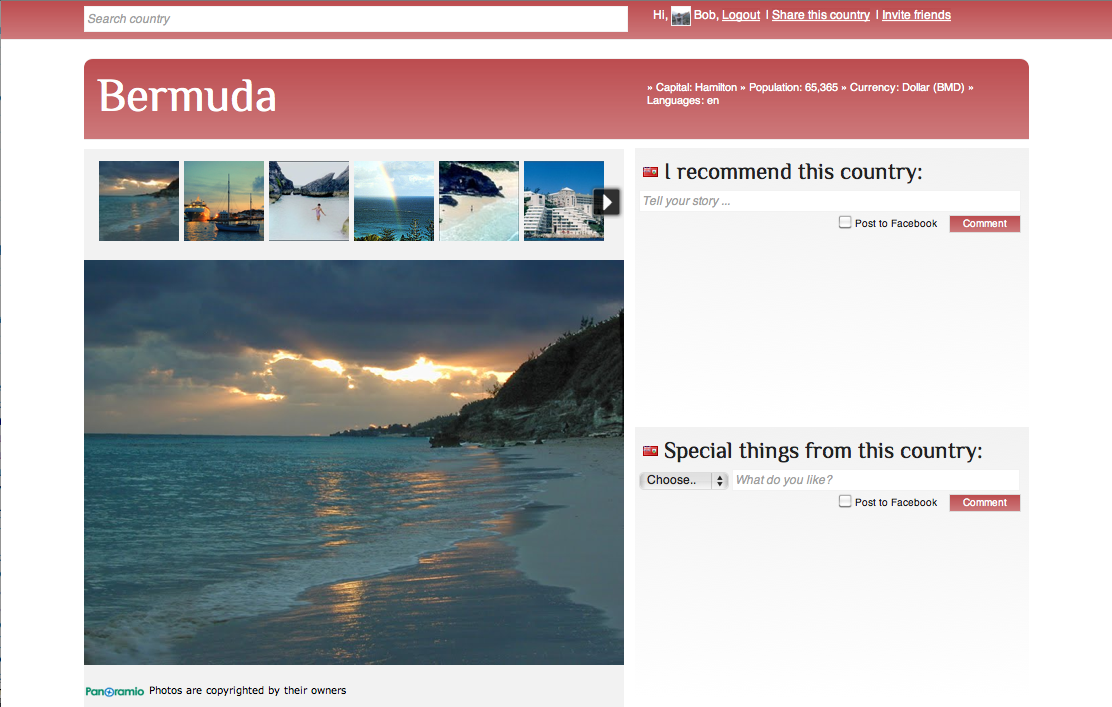
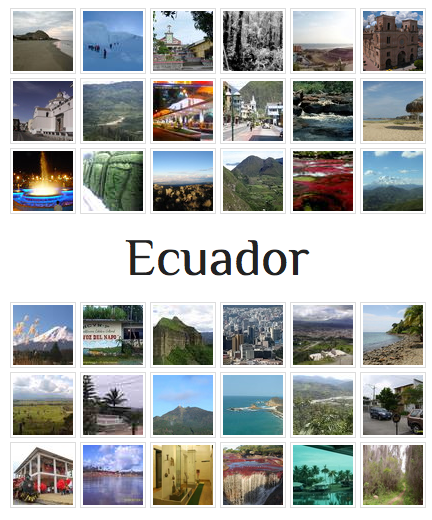
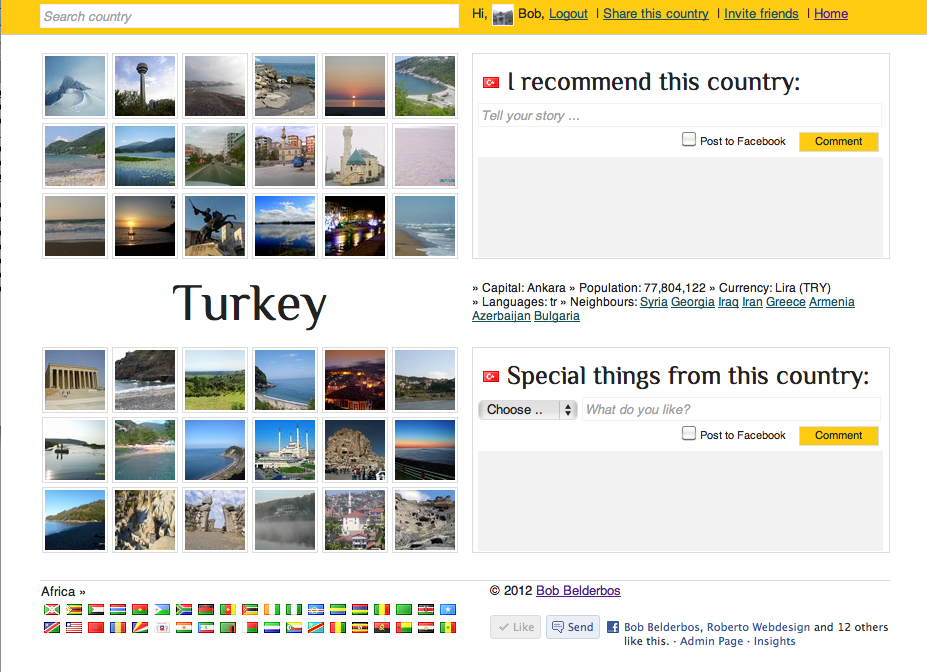
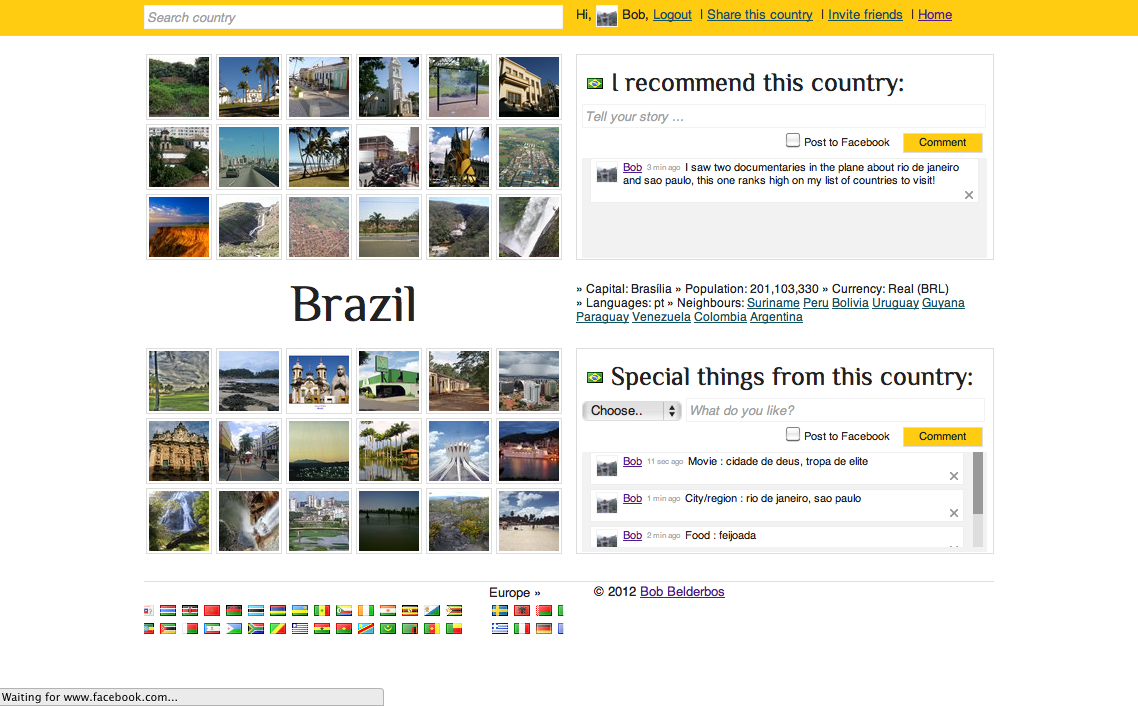
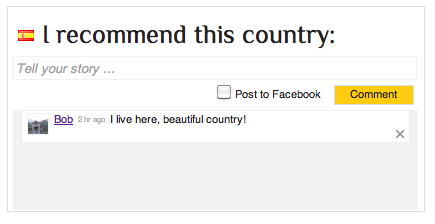
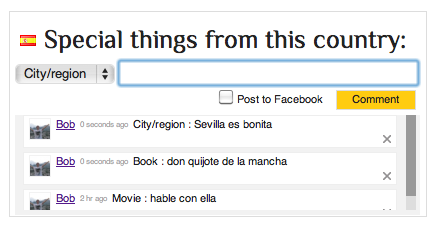
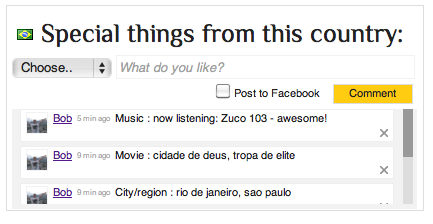
Examples

Check out the site here. I also made some printscreens:

australia
myanmar
japan
italy
south korea
argentina
bermuda

New Facebook App / travel site: Globe Explorer

In today's post I present a new Facebook App: Globe Explorer. I will show some printscreens and techniques I used in the current design. As usual, I started simple to expand with new features in the future.

New here? You might want to subscribe to my blog by email or RSS.

featured image

The idea of the app is to bring together basic info of almost all countries in the world and show attractive photos. See my last post how I got the basic data.

On top of that I built a login with Facebook to allow people to add recommendations and "special things" of the country, to add more personal value to the data. Again, a lot more can be done like user profiles, allow users to upload photos, location checkins, user following/mentions/likes, etc., but this is a start.

In the rest of the post, I'll show you some techniques I used developing this site.

The design

This is the homepage::

homepage logged out

With more navigation options when logged in with Facebook:

homepage logged in

When browsing to a country, the image gallery changes to display photos of that country:

ecuador image gallery

Images show a bigger version when hovering over them with your mouse. This is done with the jQuery plugin Image Preview:

images overalay
images overlay
image overlay

Basic specs from DB, again see my preparation work how I got the data:

specs

A typical country page, for example Turkey:

turkey country page

... or what about Brazil?

brazil country page

Technologies behind it

HTML5 boilerplate

This is indeed, as their page says, "a rock-solid default for HTML5 awesome": performance, HTML5 ready, cross-browser support, CSS skeleton, etc. I did put in a reset css to wipe out more unwanted default browser styles.

h1 and h2 fonts

The header fonts are "Philosopher" which you can get from Google Web Fonts and is easy to add:

   <link href='http://fonts.googleapis.com/css?family=Philosopher:400,700' rel='stylesheet' type='text/css'>

Clean URLs

Each country is accessible under baseurl/two-digits, for example:

Nicaragua:

clean urls

Brazil:

clean urls

This is much better than index.php?country=ad. Put this in .htaccess (if you use Apache webserver) to support clean URLs (see also this post)

   RewriteEngine On
   RewriteRule  ^[a-z0-9]+.(php|js|css|html)$ - [NC,L]
   RewriteRule ^([a-zA-Z_0-9-.]+)$ index.php?country=$1

Autocomplete

One of the things I like most and one of my favorite jQuery plugins (another recent example of its power). You start typing in the search box and the corresponding country(ies) with flag(s) show up, press enter when your country is selected and it redirects to the page of the country. Not that hard to code; the jQuery:

   $("#searchCountry").autocomplete( "searchCountry.php");
   ..
   // http://forum.jquery.com/topic/jquery-autocomplete-submit-form-on-result
   $("#searchCountry").result(function (event, data, formatted) {
   	$("#searchCountry").val('');
   	
   	$("#feedback").html('<img class="loadingImg" src="img/ajax-loader.gif" id="loading" />');
   	
   	var country = formatted.replace(/(<.+?>)|&nbsp;/gi, '');
   	
   	if(country != 'No country found!') {	
   		$.post("getCleanUrl.php",
   			{ search: country},	function(data){
   				location.href= data;
   			}
   		);
   	} else {
   		$("#loading").hide();
   	}
   });

... and the php of "searchCountry.php":

   <?php
   include("conn.php");
   include("functions.php");
   
   $_GET = sanitize($_GET);
   
   $q = strtolower($_GET["q"]);
   if (!$q) return;
   
   $q = "SELECT iso2,country FROM countries where LOWER(country) like '%$q%' AND longitude NOT LIKE ''";
   $r = $link->query($q);
    
   if(mysqli_num_rows($r)) {
   	while($row = $r ->fetch_object()){ 
   		$iso2 = strtolower($row->iso2);
   		echo '<img src="img/flags/'.$iso2.'.gif">&nbsp;'; 
   		echo '<span class="countryCode" id="' . $iso2 . '">'.ucfirst(strtolower($row->country)) . '</span>';
   		echo "n";
   	}
   	
   } else {
   	echo 'No country found!';
   }
   $link->close();
   ?>

... and the php of "getCleanUrl.php":

   <?php
   include("conn.php");
   include("functions.php");
   $_POST = sanitize($_POST);
   $search = strtoupper(trim($_POST['search']));
  
   $q = "SELECT iso2 FROM countries WHERE country LIKE '$search' limit 1"; 
   $r = $link->query($q); 
  
   while($row = $r ->fetch_object()){
  	 echo strtolower($row->iso2);
   }
   ?>

To see this in action:

jquery autocomplete

Facebook authorization

Get v.3.1.1 from github , usually I copy the with_js_sdk.php which includes both PHP and JS SDKs and get all html out and make it an fb.php include file. Put in you app ID + secret, and you can start to use authorized stuff when $user gets defined (login). I used the login-button from FB with the extra permission to post to wall "publish_stream" (only if user checks the box when commenting, see later on):

   <div style="display:inline; " class="fb-login-button" data-show-faces="false" data-width="400" data-max-rows="1" scope="publish_stream"></div>

Get social content

On each country page a user can add recommendations:

recommend country

... or like "special things" (dropdown with Expressions, Food, Cities, Traditions, Movies, Music, etc.):

special things

When you change the category (object) in "special things", the title changes, compare the previous printscreen with the next two:

special things country

When comments add up, I use a vertical scroll bar (jScrollPane), which gives an elegant style while I can leave the "display comment" sections a 100px height:

example of jScrollPane

Post to Facebook

You can post your comment to Facebook by activating the checkbox under the input field. Opt-in is better I think, because opt-out in FB Apps is usually seen as spammy. Here you see this in action:

activate post to FB

And how this looks on your FB wall:

result on FB wall

Facebook JS SDK functions:

You can invite friends and let users share content to their walls with just this code (having included the FB JS SDK above):

   function Invite () {
     FB.ui({ method: 'apprequests',
       message: 'Check out this App if you like travelling and exploring countries ...'
     });
   }
  
   function WriteToWall(urlName, urlLink, urlDescr, urlLogo){
   	 FB.ui({ 
  		method: 'feed', 
      	name: urlName,
  		link: urlLink,
  		description: urlDescr,
         picture: urlLogo
  	});
   }
  
   .. which you call from your HTML
   
   ..
   <?php if ($user): ?>
  	Hi, <?php echo fbImg($user) . ' '. $user_profile['first_name']; ?>, 
  		<a href="<?php echo $logoutUrl; ?>">Logout</a>
  		&nbsp;|&nbsp;<a href="#" onclick="WriteToWall('<?php  echo $title.'',''.$countryUrl.'',''.$metaDescription.'',''.$ogImage; ?>')" 
  			title="Send to your wall">Share this<?php if($_GET) echo ' country'?></a>			
  		&nbsp;|&nbsp;<a href="#" onclick="Invite()" title="Tell your friends about this app">Invite friends</a>
  
   <?php else:
   ..

Invite your friends to use the app:

invite friends

Share a certain (country) page to your wall. A random image of the country will be shown (and under the hood set as meta..og:image, the tag Facebook 'listens' to in order to display the image in the post, more info here):

share to wall

User registration

In the fb.php include I check if the user was here before and if not, I register him/her:

   ..
   if ($user) {
    try {
      // Proceed knowing you have a logged in user who's authenticated.
      $user_profile = $facebook->api('/me');  // <= this is from the FB PHP SDK
  
  	// register user 
  	if(!userExists($user) && $user_profile) {
  		userRegister($user_profile);
  	}

Footer

In the footer a carousel of flags per continent. You can check this post how to make such a carousel effect with jQuery (and some CSS).

flag carousel

To conclude

This is it for now. Let me know if you have questions and/or if you have any feedback/ suggestions what could be cool to add to this app ...

How to start building your own country/ travel API

I am about to finish a travel Facebook App. The design looks promising, especially because of the info and pictures I could crawl together. Few more days and I will release a first draft. For now the answer to: "how to create your own country API?"

New here? You might want to subscribe to my blog by email or RSS.

country api featured image

That seemed a challenge at first, but combining 1 flat txt file and 2 APIs, I got a pretty decent database that served my purpose.

It serves the travel fans under us to browse countries, viewing nice photos of those countries, and comment on each country page as well (logged in with Facebook). If it works, and people start to add content themselves, it will become a personal experience. It starts basic, new features can always be added.

But before this could work in any way, the app has to provide some content itself. Especially with a travel / country app, photos are unmissable!

In this posts some examples how to get the data required for a country database to build a nice travel app ...

First things first, the raw data

I used geonames.org to get some basic info for all ISO 2 country codes, see a list here. I found small, nice country flag gif images here (filenames match the two-char ISO2 names -> AE, DE, NL, etc.).

2nd of all: the worldbank API to get exact longitudes and latitudes per country.

Lists of these parameters per country exist. We need them for the Tixik API (next step). However the lists I found (example), did not work quite well with Tixik. What worked best were the results from the worldbank API , for example: for Spain - you can make the call to get all latitudes/ longitudes for all countries with this call. Then update the DB with these values and you have a pretty nice set to work with:

sql country table

3rd: tixik country photo links

Now the fun starts: photos! A travel app is about showing photos. You will see the endresult, but here is the workhorse to get to the data: Tixik. I discovered it by accident, but it has a very simple yet efficient api. Quote from Tixik: "We have hundreds of thousands of presentations with pictures and texts in multiple languages. Would you like to have some of them on your website?"

And the answer is "of course we want that!". Well, it is plain simple and now you see the "why" of the latitude and longitude of the last step: http://www.tixik.com/en/api/nearby?lat=36.106121163930377&lng=28.07762145996093&limit=10&key=demo. You can raise the limit to get more photos, the key you put in when you sign up with just your name and email. To get some nice picture (links) from Andorra click here.

When processing this info for each country, you have a database with about 10.000 pic links:

images table with imported images from tixik

Some code to get this working ...

I will keep it short given the size of this post. So not all details, just the core things you need to get started. :

  • Create 2 DB tables: one to hold the country info and another to hold links to the images (from Tixik). Relation is the two letter iso2 country code.
  •    CREATE TABLE IF NOT EXISTS `countries` (
         `id` int(11) NOT NULL AUTO_INCREMENT,
         `iso2` varchar(2) NOT NULL,
         `country` varchar(50) NOT NULL,
         `capital` varchar(50) NOT NULL,
         `area` varchar(20) NOT NULL,
         `population` varchar(20) NOT NULL,
         `continent` varchar(2) NOT NULL,
         `currCode` varchar(3) NOT NULL,
         `currName` varchar(20) NOT NULL,
         `phone` varchar(10) NOT NULL,
         `langs` varchar(2) NOT NULL,
         `neighbours` varchar(30) NOT NULL,
         `longitude` varchar(20) DEFAULT NULL,
         `latitude` varchar(20) NOT NULL,
         PRIMARY KEY (`id`)
       ) ENGINE=MyISAM  DEFAULT CHARSET=utf8 AUTO_INCREMENT=1 ;
       
       -- --------------------------------------------------------
       
       --
       -- Table structure for table `images`
       --
       
       CREATE TABLE IF NOT EXISTS `images` (
         `id` int(11) NOT NULL AUTO_INCREMENT,
         `country` varchar(2) NOT NULL,
         `name` varchar(200) NOT NULL,
         `tn` varchar(200) NOT NULL,
         `tn_big` varchar(200) NOT NULL,
         `created` int(11) NOT NULL,
         PRIMARY KEY (`id`)
       ) ENGINE=MyISAM  DEFAULT CHARSET=utf8 AUTO_INCREMENT=1 ;
    
    
  • Import the data from geonames: I got to this file. You can run a simple Perl script to bounce the SQL insert statements (see my comment on SQL insert in the next step ...):
  •   while(<>){
        chomp;
        @arr = split(/t/, $_);
     	
        $insert ="INSERT INTO countries (id, iso2, country, capital, area, population, continent, currCode, currName, phone, langs, neighbours) 
          VALUES (NULL, '$arr[0]', '$arr[1]', '$arr[2]', '$arr[3]', '$arr[4]', '$arr[5]', '$arr[6]', '$arr[7]', '$arr[8]', '$arr[9]', '$arr[10]');";
      
        print "$insertn";
      	
      } 
    

    Run it as $ perl test.pl country_file - it will take that file as input, loop through it, split each line into an array based on the tab character, etc.

  • Update longitude and latitude from worldbank API:
  •   function getLocationParamsWorldBank(){
        // saved xml from http://api.worldbank.org/countries?per_page=300
        $wbUrl = 'api.worldbank.countries.all.xml';
        $ns='wb';
       
        $xml = @simplexml_load_file($wbUrl);
        $params = array();
        $counter=0;
       
        foreach($xml->children($ns,true) as $i) {		
          $query = "UPDATE countries SET longitude='".$i->longitude."',
            latitude='".$i->latitude."' ";
          $query .= "WHERE iso2='".$i->iso2Code."';";
          echo $query ."<br>";
        }
      }
    

    No SQL security here, because I am going to do the import myself. I can also do the import with PHP MySql commands but for this exercise I wanted to see the commands first and then copy paste. If you want to let PHP do all the work, run something like this on the $query (after having created the database $link object):

       $r = $link->query($query);
       $returnID = $link->insert_id;
    
       if(is_numeric($returnID)) { 
       ..
    
  • Last prepare the Tixik URLs to get the images per country and write the links to the images table:
  •   function getThumbs($country) {
        $params = getLocationParamsDb($country);  // skipped for brevity
        $xml = queryTixik($params);
        $images = processTixikImages($xml);	
        writeImagesToDb($country, $images); // skipped for brevity
      }
       
      function queryTixik($params, $limit = 50) {
        $latitude = $params['latitude']; // form "getLocationParamsDb"
        $longitude = $params['longitude'];
        $tixKey = "--obtain from tixik.com -- ";
       	
        $txUrl = "http://www.tixik.com/en/api/nearby?lat=$latitude&lng=$longitude&limit=$limit&key=$tixKey";
        $xml = simplexml_load_file($txUrl, 'SimpleXMLElement', LIBXML_NOCDATA); 
        return $xml;
      }
       
      function processTixikImages($xml){	
        $images = array(); $i = 0;
        foreach ($xml->items->item as $item) {
          if (@fclose(@fopen($item->tn, "r")) ) {
            $images[$i]['name'] = str_replace("'","'",$item->name); // not screw up sql statement
            $images[$i]['tn'] = $item->tn; // thumbnail
       	$images[$i]['tn_big'] = $item->tn_big; // bigger version of image
       	$i++;
          }
        }
      }
    

    I became a fan of shortening my functions. It is a good programming practice. Next time I turn the 4 functions into 8, it really makes things cleaner.

    Nice trick: LIBXML_NOCDATA allows you to read the CDATA outputs (comments) which are not processed per default by simplexml_load_file. XML Tixik returns, has this occasionally so err on the safe side.

    Another thing that I wanted to make sure was that each thumbnail link was actually accessible. Here is how: basically you can test for the positive return of:

       if (@fclose(@fopen($item->tn, "r")) ) { .. }
    

    Again, I skipped some details to not make this post too long. Play with it, I learned quite a bit putting myself up for this exercise. The result was worth the effort though.

Sneak preview

OK, you might be wondering now: "the data is there, now what?!" ... I will give you a quick preview of the FB app I am building ...

preview travel app

Git in a nutshell: some basics to get you started

Git is really not that hard to learn, yet it is a powerful tool to manage version control of your work. I learned the basics recently studying the Ruby on Rails tutorial. From there Pro Git is an interesting follow-up. This post shows some basic Git to get started.

New here? You might want to subscribe to my blog by email or RSS.

featured image

According to the Pro Git book, Git was designed to meet the following goals:

  • It should be fast;
  • It should have a simple design;
  • It should have strong support for non-linear development (thousands of parallel branches);
  • It should be fully distributed;
  • Git should be able to handle large projects like the Linux kernel efficiently (speed and data size).

These are indeed advantages to use Git over other version control systems. It is very fast, mainly because it works against local repositories (vs. remote syncing for every operation).

Initial config

After installing Git there are some initial configs you should make:

  • Set your name: $ git config --global user.name "Fname Lname"
  • Set your email: $ git config --global user.email [email protected]
  • To make optional aliases: $ git config --global alias.co checkout
  • Choose your favorite text editor, mate in my case: $ git config --global core.editor "mate -w"
  • Pick a diff tool: $ git config --global merge.tool vimdiff
  • Color Git console outputs: $ git config --global color.branch auto ; git config --global color.diff auto ; git config --global color.status auto

The basics - and maybe all you need to know for now (?)

It requires only a few basic concepts to successfully work with Git (the following commands should be executed in the working directory) :

  • Put your project under git control: $ git init ; this creates a .git directory in your project folder.
  • Add files to be tracked (staged files): $ git add
  • If you use $ git add . , the . (dot) adds all files at once.

    If you modify a file after you run git add, you have to run git add again to stage the latest version of the file. You can exclude files by filling in the .gitignore file in the working directory (for example to exlude logfiles in a Ruby on Rails project fill it with: .bundle, db/*.sqlite3, log/*.log, tmp/**/*)

  • Commit changes. Git takes a snapshot now: $ git commit -m "initial commit"
  • Clone a (remote) git project: $ git clone git://github.com/schacon/grit.git mygrit (where mygrit is the local directory you want to copy the project to) - $ git pull/ push / fetch / clone has much more to it, check out the Pro Git book for more info.
  • Get info about files, commits, and changes: $ git status / $ git diff / $ git log (gitk for graphical log viewing). The commands have a lot of switches, Pro Git shows a useful example for filtering in large projects: $ git log --pretty="%h - %s" --author=gitster --since="2008-10-01" --before="2008-11-01" --no-merges -- t/ -> pretty powerful!

The real power: Git Branches

Branches allow to diverge from the main line of development. This allows developers to work on bug fixes and new features without interfering with the main (live) branch (master). Later you can merge branches with each other or with the master branch. The basics are quite simple:

  • Open up a new branch: $ git checkout -b testing ; $ git branch shows you all branches in the project, the single star before one of the branches is the active branch, in this case "testing" became the active branch with the "checkout" switch.
  • Commit changes like normal: $ git commit -a -m "commit message of thing(s) done in branch". Again, if you have added any new files to the project since the last commit, you still have to run "git add" first.
  • When done with your branch, switch back to the master with: $ git checkout master
  • If happy with the results, merge the branch into the main one (master): $ git merge testing
  • If the branch is not needed anymore, delete it: $ git branch -d testing

This is the easiest example of branching, there are more advanced options possible like 3-way merging (merging various branches at once) and rebasing, again see Pro Git for more info.

And this concludes the basics of Git, which matches the first 4 chapters of Pro Git and the end of Chapter 1 of the Ruby on Rails tutorial. I think these notes will cover me 95% in the following web projects I develop (alone). With multiple developers I might need to write a follow-up post with more advanced concepts !

Set up your GitHub account

One thing is missing from this basic Git tutorial, setting up GitHub! You typically want to push your code to GitHub to have a backup and to allow for collaborations with other developers. Check the "SSH keys" part when creating your account. After creating a new repository in the GitHub GUI, pushing your code is easy:

  • The following command configures the push location of your local working directory: $ git remote add origin [email protected]:username/first_app.git
  • $ git push origin master ; pushes the code to the remote location. Again you need to have the SSH key working to do this.
  • From here on code changes sync to the remote server each time you run $ git push

Heroku cloud deployment

The Ruby on Rails tutorial introduced me to Heroku as well. I copy the steps here to push your code to Heroku:

  • Install the corresponding Ruby Gem: $ [sudo] gem install heroku
  • Sign up for Heroku and configure your SSH keys, then run $ heroku keys:add
  • To create a subdomain on the Heroku servers, use: $ heroku create --stack cedar
  • Heroku return something like "Created http://severe-fire-61.heroku.com/ | [email protected]:severe-fire-61.git ... Git remote heroku added" and that is it!

You can also use Heroku also when developing Facebook Apps! See this nice tutorial.

For more info, check out the Git site's documentation as well

Web design shift: read "Responsive Web Design"

With an increasing amount of web devices (mobile, tablets, higher resolution screens), web designers are faced with a challenge: how to respond well to all? Ethan Marcotte's book "Responsive Web Design" provides a potential shift in how we design for the web!

featured image

When I started to design for the web some years ago, I loved fixed width designs. But most fixed width pages aren't easily readable on a mobile device. New devices are invented every year and the number of pages accessed through mobile browsers keeps increasing rapidly! So I think this book is a must read for each web designer. The book is well written, with clear examples, and you can probably digest the 141 pages in one or two days.

Ingredients for a responsive design

Print and web are inherently different media, yet up until recently a lot of sites were build as if they were for the print medium. I like the approach Marcotte introduces: one responsive web design instead of different designs for different devices. According to Marcotte the following 3 elements make up for responsive web designs:

  • A flexible, grid-based layout,
  • Flexible images and media,
  • Media queries (CSS3)

Chapters 2,3 and 4 deal with these. The last chapter provides additional info on the responsive design cycle and progressive enhancement.


1. The flexible grid (and fonts)

Before touching the grid design, we should set up the font-size to 100% as a base and use "ems" to size text up or down. What the grid is concerned Marcotte explains how to go from pixels to percentages based on the width values. You can start with pixels and calculate the percentages with the formula "target / context = result", so if a .blog div is 900px (target) and lives in a body of 960px (context), the .blog div should be 900/ 960 = 0.9375 = 93.75%. Then for the divs that live in .blog, .blog is the context so a left column would be 530/900, etc. The same applies for flexible margins (gutters between blocks).

2. Flexible images

A neat trick is to give the img a max-width of 100% to never cross the width of the div it lives in. There are some issues (distorted images) with IE < 7, so you can use AlphaImageLoader to correct this. The author further explains interesting techniques with "overflow: hidden".

3. Media queries

As of CSS2 you could define media types: all, screen, print, handheld, etc. As this was very generic ("handheld" for iphone and older phones), W3C came up with something better in the CSS3 spec: media queries.

Apart from the media type, media queries also detect the physical characteristics of the devices or browsers that render our content. A typical media query is "@media screen and (min-width: 1024px) { .. css rules .. }": this not only requires the screen medium type, but also a viewport of at least 1024px wide, for the CSS rules to be applied.

This is awesome, because now we can target very specific conditions. You can use the min-width and max-width conditions on a variety of features, for example: width, height, aspect-ratio, resolution, grid and more (see page 76-78). And they can be chained together! For example: "@media screen and (min-device-width: 480px) and (orientation: landscape) { ... }"

The most important point is that media queries are useful if you have the groundwork set up well: a liquid layout, flexible fonts and images. The best way is to follow the book step-by-step applying the examples on your own "responsive web design".


Some examples of responsive design

Four sites worth studying (just resize your browser window to see the amazing effect - wow) :

Mobile first

A good approach these days is to start designing for the smaller mobile canvas and progressively enhance with media queries targeting higher resolutions with "min-width" ("resolution breakpoints"). I probably will experiment with this approach designing future sites (Ethan convinced me!).

What about you? Let me know what experiences you have designing "responsive web designs" ...

Why the Kindle is my number one reading device

The kindle is serious reading pleasure for me. I actually get a lot of reading done without getting my eyes tired. I still have the GEN3 (photo). Now you can get a Kindle Touch for $99 and a Kindle Fire for $199, however the older Kindle is just brilliant.

Why does the Kindle Rock ?

1. The screen quality

It reads like a paper book, it does not reflect in the sun. You can read great quantities without getting eye-tired. This is especially important due to the large amount of books I have on my list ;) - It is true though that the Kindle format is way better than the average pdf. Most pdf books however read well enough.

2. Device management

New here? You might want to subscribe to my blog by email or RSS.

Navigation is pretty simple. The touch version probably is better, but the older one with the sidebuttons works quite well. The Amazon store integration is awesome. You buy a book online and it syncs automatically to your Kindle. I am not sure how 3G is offered now, but when I bought my GEN3 Kindle about a year ago, 3G was just a little bit more expensive, so ideal for travelling independency. But without 3G you can still sync your books via Wifi, or just connect your Kindle to your laptop for old-fashioned USB transfers.

3. No distractions (!)

This is an important argument for me to stick with the Kindle for reading. I am a big fan of Apple products, but when it comes to reading, all (social) apps and notifications are not doing any good: I never get much reading done. This is not the case with a Kindle: you basically use it for what it is good at: accessing ebooks. As many things: the simpler the better and the more efficient.

4. Design

featured image

The design is great. I think the screen size is ideal for reading. You can also change character size, screen orientation (vertical vs. horizontal), spacing, etc. Again I have a GEN3 that had this all figured out quite well already. I imagine the newer versions only got better. The GEN3 already had MP3 support which you can easily toggle with alt-spacebar, so I can even 100% concentrate in public places. It even had text-to-voice already, so at least the Kindle formatted books can be read out loud if I want to listen for a change. Another important thing to note is the large battery duration. I don't have the specs at hand, but it is not often I have to recharge.

These are some highlights of my satisfaction with my GEN3 Kindle. Conclusion: low distraction rate, reading-friendly paper-like screen format, and easy book syncing (pdf / epub / usb / purchased). For me it's the best reading device out there.

Twitter widget to show your latest tweets in carousel slider

Today I show you a script to display the latest tweets on your website or blog. You can use two ways: make a call to Twitter's user_timeline or use YQL/ search.twitter. I will wrap the results in the Tiny Carousel jQuery plugin. Read on ...

Start & issues

New here? You might want to subscribe to my blog by email or RSS.

I started simple with a an import of Twitter user_timeline with file_get_contents (from URL: http://twitter.com/statuses/user_timeline/bbelderbos.json?count=5), based on this post. However, although this worked perfectly on localhost, on my remote server it did not. Besides, I soon got a Rate limit exceeded response from Twitter (which does not make sense because at least I should have 150 requests per hour) You can get the code here.

Alternative solution: YQL

featured image

Recently I blogged about YQL, a powerful way to crawl the internet. Twitter is well represented among its tables. So I applied what I learned to get my tweets via the search.twitter table in YQL. See the code below: yql.php does the heavy lifting. Instead of file_get_contents (which I would use normally), I use curl to get the URL content. That seemed to work better with my remote server. It returns JSON (you can also choose XML or RSS, but JSON is said to be fastest). Use json_decode to parse JSON into an array. You see some commented lines you can uncomment to print debug info in case you have any issue. I use the Tiny Carousel jQuery plugin to show the results in a nice slider.

Full code display

== yql.php ==

   <?php
   $q = "select text,profile_image_url from twitter.search where q='from:@bbelderbos' limit 10";
   $url = "http://query.yahooapis.com/v1/public/yql?q=";
   $url .= rawurlencode($q);
   $url .= "&format=json&env=store://datatables.org/alltableswithkeys";
   
   // using curl, as file_get_contents sometimes fails on remote server
   // $json = file_get_contents($url, true);
   $json = get_data($url);
   
   $info = json_decode($json, true) ;
   // debug, if json_decode fails
   // $error = json_last_error(); echo $error; exit;  
   // debug, check structure result
   // echo "<pre>"; print_r($info ); echo "</pre>"; exit; 
   
   // function to get URL via cURL
   // from: http://davidwalsh.name/download-urls-content-php-curl
   function get_data($url) { 
     $ch = curl_init();
     $timeout = 5;
     curl_setopt($ch,CURLOPT_URL,$url);
     curl_setopt($ch,CURLOPT_RETURNTRANSFER,1);
     curl_setopt($ch,CURLOPT_CONNECTTIMEOUT,$timeout);
     $data = curl_exec($ch);
     curl_close($ch);
     return $data;
   }
   ?>

Roll your own YQL query at the YQL console:

yql query

== index.php ==

  <?php include 'yql.php'; ?>
  <!DOCTYPE html PUBLIC "-//W3C//DTD XHTML 1.0 Strict//EN" "http://www.w3.org/TR/xhtml1/DTD/xhtml1-strict.dtd">
  <html xmlns="http://www.w3.org/1999/xhtml" lang="en" xml:lang="en">
   
  <head>
    <meta http-equiv="Content-Type" content="text/html; charset=utf-8" />
    <title>Last Tweets @bbelderbos</title>
    <link rel="stylesheet" href="style.css" type="text/css" media="screen"/>
   	
    <script type="text/javascript" src="js/jquery-1.4.2.min.js"></script>
    <script type="text/javascript" src="js/jquery.tinycarousel.min.js"></script>
    <script type="text/javascript">
      $(document).ready(function(){
        $('#slider1').tinycarousel({ pager: true, interval: true, intervaltime: 5000  });	
      });
    </script>	
   		
    </head>
    <body>
      <div id="slider1">
   	<div class="viewport">
   	  <ul class="overview">
   	    <?php 
   	    foreach($info['query']['results']['results'] as $tweet) {
   	      $tweetText = $tweet['text'];
   	      $avatar = $tweet['profile_image_url'];
   	      
              // URLs (from http://www.phpro.org/examples/URL-to-Link.html)
   	      $tweetText = preg_replace("/([w]+://[w-?&;#~=./@]+[w/])/i","<a target="_blank" href="$1" target="_blank">$1</a>",$tweetText);
   
   	      // twitter handles
   	      $tweetText = preg_replace('/(@S+)/i',"<a target="_blank" href="http://twitter.com/$1" target="_blank">$1</a>",$tweetText);
   
             // hash tags map to search?q=#hash
   	     $tweetText = preg_replace('/(#)(S+)/i',"<a target="_blank" href="http://twitter.com/search?q=%23$2" target="_blank">$1$2</a>",$tweetText);	
   
   	     echo '<li><a href="http://twitter.com/bbelderbos" target="_blank"><img src="'.$avatar.'" alt="bob avatar"></a><p>'.$tweetText . "</p></li>";
   				}
   	   ?>
   	 </ul>
       </div>
     </div>
   </body>
   </html>

The preg_matches are to turn handles (@), hash tags (#) and links into URLs. I am not expanding on the CSS in this post, let me know if you have any questions.

Check it out:

Ruby script to get Facebook Like stats for your blog

In spite of my proposed Scala, HTML5, and Mobile learning, I will start this New Year learning Ruby :) - I am about to read Eloquent Ruby, but before that I wanted to wet my apetite with a practical case ...

The challenge

Browsing http://facebook.stackoverflow.com/, I saw a nice one to work on: Getting all likes on my domain (facebook). So how to get stats on likes for each of your blog posts? Read on ...

How to do it

featured image

New here? You might want to subscribe to my blog by email or RSS.

It is nice to get a feel of a language by first playing with it, I took the same approach learning Perl. Of course I had to use Google a lot for even basic things (Ruby hashes, loops, the very useful Perl Dumper variant "pp", etc.), but I soon became convinced that Ruby is fun to learn and a powerful language to have in your toolkit.

First step is to make a sitemap XML file of your site. It turned out I had to do that anyways for SEO purposes. For Wordpress there is an excellent plugin. You can see my sitemap here.

So we start scripting. First we need to load that file from the web with a call to "Net::HTTP.get_response" (requires 'net/https')

Next you want to parse the XML to get all the URLs. REXML makes that simple with "REXML::Document.new(xml_data)" and then you use "doc.elements.each('urlset/url/loc')" to loop over the URLs

Then the real data crunching: you reach out to https://graph.facebook.com/?ids= which (I just discovered) does except a comma-seperated list of URLs. Keep in mind the https so require 'net/https' and use "http.use_ssl = true". Obviously this is the desired way to do it: clustering all URLs together to make one big query instead of hundreds of small ones. You do need to shave the last comma off, otherwise the query will fail (url[0..-2])

Facebook Graph returns JSON so this needs to be parsed with JSON.parse (requires 'json'). I put all the results in the "likes" hash (keys are URLs, values are the number of likes). You could sort it numerically descending in Ruby, but I was comfortable doing it from the cli with "ruby getBlogLikeStats.rb | sort -n -k2"

And that is all there is to it. Building this in Ruby turned out to be a painless and fun process. And that for somebody that still has to learn the language basics, nice!

Source

Source is printed below and you can download it here.

   #!/usr/bin/env ruby
   require 'net/https'
   require 'rexml/document'
   require 'json'; 
   
   urlXml = 'http://bobbelderbos.com/sitemap.xml'
   url = 'https://graph.facebook.com/?ids='
   likes = Hash.new;
   
   xml_data = Net::HTTP.get_response(URI.parse(urlXml)).body
   doc = REXML::Document.new(xml_data)
   
   doc.elements.each('urlset/url/loc')  { |element| url += element.text + "," }
   
   uri = URI.parse(url[0..-2])
   http = Net::HTTP.new(uri.host, uri.port)
   http.use_ssl = true
   request = Net::HTTP::Get.new(uri.path + "?" + uri.query)
   response = http.request(request)
   data = response.body
   result = JSON.parse(data)
   
   result.each { |url| likes[url[1]['id']] = url[1]['shares'] }
   
   likes.each do|url,numLikes|
     puts "#{url}: #{numLikes}"
   end

Have fun!

Update 08.01.2012: What about Twitter?

With the Tweetmeme API you can easily query the amount of tweets. Only incovenience is that http://api.tweetmeme.com/url_info.json?url accepts only 1 URL at the time it seems, so you need to make a call for each URL (as opposed to the earlier mentioned Facebook Graph API that does handle multiple URLs in one call)

Ruby code to get your tweet stats:

Executing the script from CLI:

cli tweet stats

   #!/usr/bin/env ruby
   # copyright (c) 2012 Bob Belderbos
   # created: January 2012 
   require 'net/http'
   require 'uri'
   require 'rexml/document'
   require 'json' 
   require 'pp'
   
   urlXml = 'http://bobbelderbos.com/sitemap.xml'
   url = 'http://api.tweetmeme.com/url_info.json?url='
   
   xml_data = Net::HTTP.get_response(URI.parse(urlXml)).body
   doc = REXML::Document.new(xml_data)
   
   doc.elements.each('urlset/url/loc')  do |element| 
     url += element.text
     resp = Net::HTTP.get_response(URI.parse(url))
     data = resp.body
     result = JSON.parse(data)
     print "#{result['story']['url']} => #{result['story']['url_count']}n"
   end

An overview of a productive 2011, 2012: more to come ...

As a tradition at the end of the year I'll take a moment to reflect back what this blog brought you this year. 2011 was a year of APIs, good books, reading and music apps, Perl exploring and more ...

New here? You might want to subscribe to my blog by email or RSS.

Up and foremost, you can check all posts in the Archives (which is created with the very cool Snazzy Archives).

featured image

01.2011: one of my favorites is the post about the Youtube gdata API to make a trailer wrapper for sharemovi.es. I did some twitter digests as well, but stopped it, because I found it too much clutter. Some cool jQuery snippets (and later jeditable). More jQuery in 2012, that's for sure!

02.2011: post about one of my favorite books about software development

03.2011: what turned out to be a popular post: Let Facebook "Like" button pick the right image!. This post answered a question a lot of developers had: why doesn't Facebook show the right image when I "like" a post? Now meta tag definition is more apparent in the Open Graph Beta, but back in March this was an issue lots of us struggled with. Another interesting post was the pros and cons of the FB comment box plugin that had its second version released. I would embrace it but some weeks ago, I decided to stick with Disqus. Definite hightlight in March was my weekend-hack-Facebook-app "My Reading List" (visit it here). People are still sharing books weekly via this App, nice!

04.2011 - some FB posts, but highlights are two well received articles about the passionate programmer, still one of my favorite inspirational career titles, and some notes on good software development

05.2011 - no posts

06.2011 - back to Facebook App creation. After sharemovi.es and "my reading list", I wanted to do something with Music, so I made Friends Jukebox (visit here): a simple app to know what music your friends like, bundling the power of the LastFM API and the Youtube API to provide artist data and music videos. Video demos about all 3 FB Apps can be seen here (btw, Screenr is an awesome piece of software to record and propagate your own videos).

07.2011 - quite some activity: canvas app example for a birthday app; FB has something like this already, but it was all about the tutorial side, and poring it into a new design. Then FB FQL, a post on blogging, and on debugging.

08.2011 - I started to learn Perl, that turned out a powerful tool to have in my toolkit! Some practical experimenting: how to post to FB with Perl, a simple script to convert text to html for Wordpress (which still saves me time weekly). G+ was about to release its API but you could already do stuff.

09.2011 - I switched to posterous getting domain http://exploringtheweb.net/, but moved back because it is hard to maintain two blogs and bobbelderbos.com has its history and loyal visitors. That aside, I designed a My Reading List widget (see in action in the sidebar), there are some more small posts with tricks, check the archives

10.2011 - 3 posts, but I'd like to mention my experimenting with Perl to scrape a webpage

11.2011 - an interesting new Yii title I reviewed, a reader request: a page to post and maintain Facebook pages (as the ID of the FB page!), but what really stood out was a huge spike in visits from hackers news on: Your own movie database in 5 minutes with IMDb API and Perl, a simple movie DB app scrapìng imdbapiwith Perl (I would use themoviedb.org a month later)

12.2011 - browse the net with YQL, a rich movie search interface with instant trailers and at last a review of FB Graph API cookbook, a useful resource for FB API developers.

2012 starts, what's next?

I probably will start (or pick up) investigating: Node.js / Javascript, Mobile development (Appcelerator Titanium), REST, Ruby on Rails, Python and Django, Cloud, maybe a compiled language (C++ or Java), security (PHP!), OOP programming, more books on software development. Enough ideas, but ...

What do you think should be on the web tech blog agenda?

Don't hesitate, any idea that can be classified as "Web technology and/or programming" is welcome, leave them below in the comments or on my FB page.

2012 means more web, more technology, more programming, and consequently more blogging. Keep on developing and working on your ideas, I am happy to share mines. Happy 2012!

Reading: FB App Development with Graph API Cookbook

Disclaimer: I received a copy of this book from Packt to review

I just finished reading Facebook Application Development with Graph API Cookbook. It provides over 90 recipes to create web apps with the Facebook API. The variety of topics and the amount of practical code examples makes it a useful reference for the FB API developer.

featured image

The book is structured as follows:

  • The first 3 chapters are a basic introduction how the API works: get the PHP SDK, set up your first (canvas) app, interacting with the social graph and how to query Facebook.
  • Chapters 4-6 focus on Javascript: chapter 4 introduces the JS SDK, chapter 5 is about Facebook Dialogs, and chapter 6 deals with the various social plugins from Facebook that you integrate on your site (like button, activity feed, etc).
  • Chapters 7-9 show a bit more advanced topics: integrating web pages (chapter 7), virtual Facebook currency to actually earn money through Facebook (chapter 8) and advertising / metrics data (chapter 9).
  • Chapter 10 is the most fun: it shows some complete Facebook apps you can build with the API
  • Chapter 11 is bonus and important moving forward: it shows the Open Graph Beta that was presented several months ago at Facebook's G8.

Code samples

I didn't have time to play with all the code samples yet, but they form a great resource for both new developers wanting to get to know the framework, as well as the intermediate/advanced developer that wants to enhance his/her skills.

Writing a FB API book is more than challenging knowing that the platform is updated very often. I found my FB apps broken this week because I didn't anticipated the oauth2 change that went live (announced on the Facebook developers blog). This might be an issue with the code samples, because I didn't see the "oauth: true" in the FB.init calls, which was the change I had to put into my apps last weeks to make them work again (more info about the fix here). Another example is the depricated $facebook->getSession() on page 15 of the book (now: $facebook->getUser() in PHP SDK 3.1) which I spotted on the author's blog post comments.

This seems inevitable, and it means you need to be prepared to have the API documentation at hand and tweak (but hey ... isn't this the best way to learn anyway?). As the book is from November this year, there won't be many of these issues, but in 1 or 2 years time there might be, so probably it would be a good idea to release an updated version of the book by then.

Kudos to the author for the amount of samples. I also think he did a good job of explaining them, and adding other technologies like PHP GD (image creation) and jQuery to pretty up the examples.

Writing style and structure

The book is easy to read/follow. It goes through the concepts in a logical order, building new examples upon previous ones. It is not necessary to read it sequentially though. There are backreferences to prerequisites, so with some experience you can easily jump in anywhere. As with most of Packt's cookbooks the structure for each recipe is: "get ready -> how to do it -> how it works -> references", as with Yii's cookbook, this worked pretty well for me. It allows for both quick scanning of code (after all a cookbook really is a reference work) as well as detailed study of the examples.

Open graph

I liked the fact that the author paid some attention to the Open Graph Beta. I still have to develop my first App in it, and from what I've seen (Spotify, reading apps), it seems the way forward! Trivia: I actually contacted the author several weeks ago that I was going to read/review his title, asking him if he had seen the G8 conf and thus if he could do a chapter on the OG Beta. I got a prompt response and I am glad he put it in :)

Learning by doing

From a personal view, learning the FB API is about practicing, writing code, play with the PHP / JS SDKs and many methods the FB API has. The many examples suits this purpose well. Again, things change fast at Facebook, and usually announcing it on their blog, so if you are developing FB apps, follow the developers blog and use this book as reference making sure you also check the latest API docs.

Conclusion

I found the content and the way it is presented very useful. Although the book is brand new, there are already some recent changes in both PHP and JS SDKs that might affect the code. So make sure you check the FB API documentation.

The advantage of this book over the API docs, is the structured format to learn the subject and clear explanations. It covers a wide range of topics in a reasonable size of 340 pages, including interesting advanced topics like virtual currency, advertising and metrics. The book's samples show a strong integration with the social graph (the real API's strength!), and a chapter on the way forward: the Open Graph Beta.

So I can recommend this title to every developer that works with the Facebook API.